
With orderbird, it’s easy to create your own items - without spending a lot of time and complicated settings. To add an item to your menu, make sure to be in the appropriate family group, e.g. “coffee”, in which the item should be available later.
In a nutshell
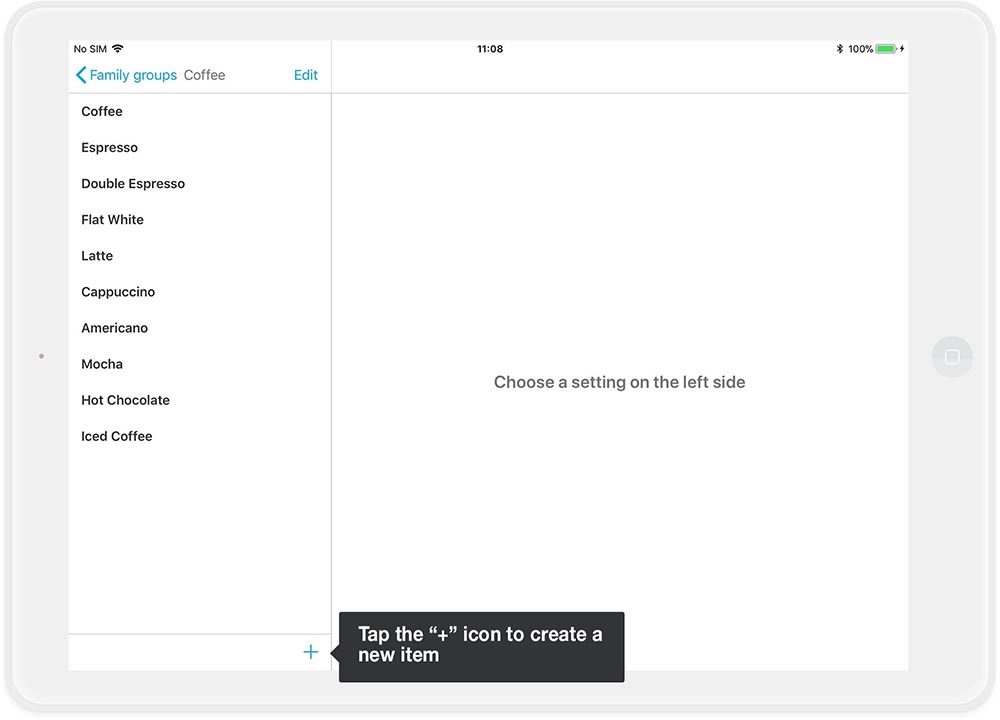
- Go to Settings > Orderpad > Menu Card in the orderbird app and tap on the family group for which you want to add an item.
- To create a new item, always tap the plus sign "+" in the bottom left corner.
- You can change an existing item by tapping on the name of the item on the left side of the screen and then make changes in the new menu on the right side.
- To change the order of items in a family group, tap "Edit" in the upper left corner. Tap on the symbol with the three grey lines, hold it down with your finger and move the item to the new position.
- If you want to delete an item, swipe from right to left over the name (Pro tip: This works anywhere in the app).
Adding an item - step by step
- Go to Settings > Orderpad > Menu and select the family group for which you want to create a new item. Click on the “+”- sign in the lower left corner to add a new item. In this example I want to create a new coffee speciality.
- On the right side of your screen you can now define all relevant settings for the item. These are the most important settings:
- Name - Enter the name of the new item as it should appear on the invoice, e.g. “Irish Coffee”
- Family group - Here you can check if you are in the correct family group.
- PLU - If you have a PLU for the item, enter it here. (PLU sounds strange to you? Then you probably don't need this field :)
- Price - Enter the price including taxes.

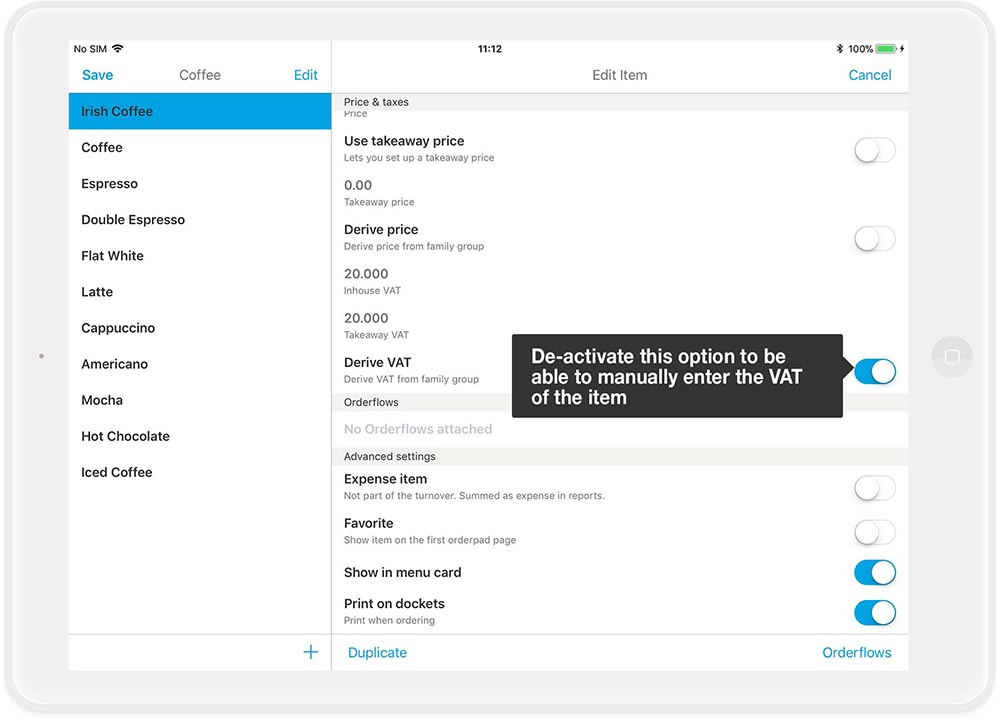
- Inherit tax rates - By default, the item has the same tax rates as the family group it is placed in. The displayed tax rates are incorrect? Then move the slider to blue and adjust them for in-house and out-of-house specifically for this item
- Have you made all your changes? Then click on "Save" in the upper left corner to complete your changes.
Tip: You can also click on the “+”- sign in the lower right corner to create another item. If you want to go pro, simply tap “Duplicate” to easily create a duplicate of the item, if you need another item with only minor changes: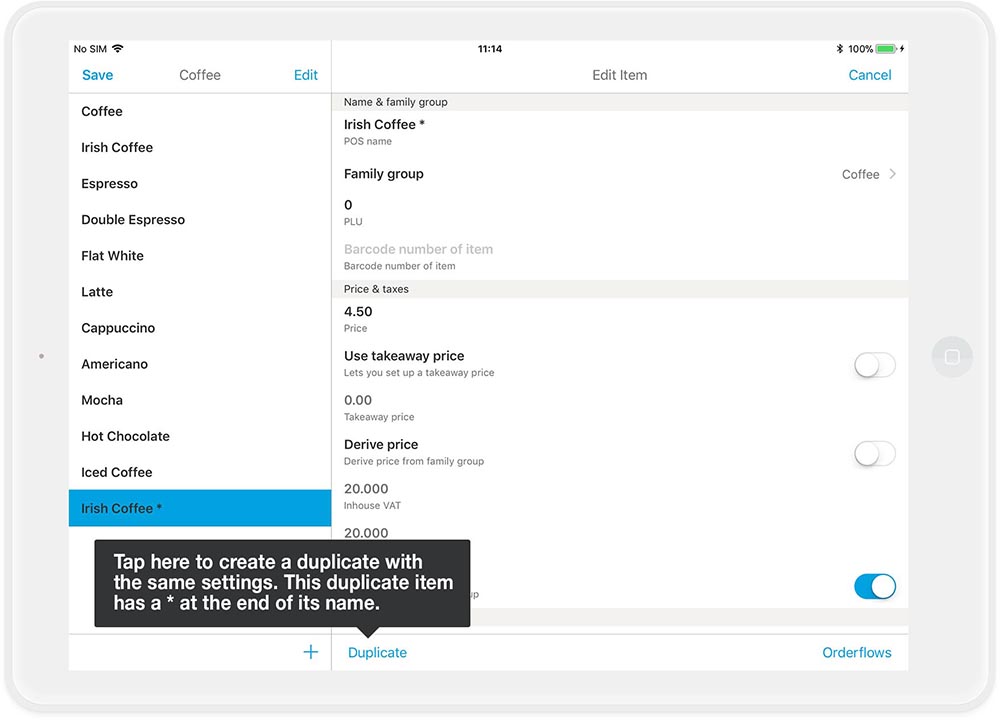
Don’t forget to save the duplicate item under a new name, as you cannot have multiple items with the same name!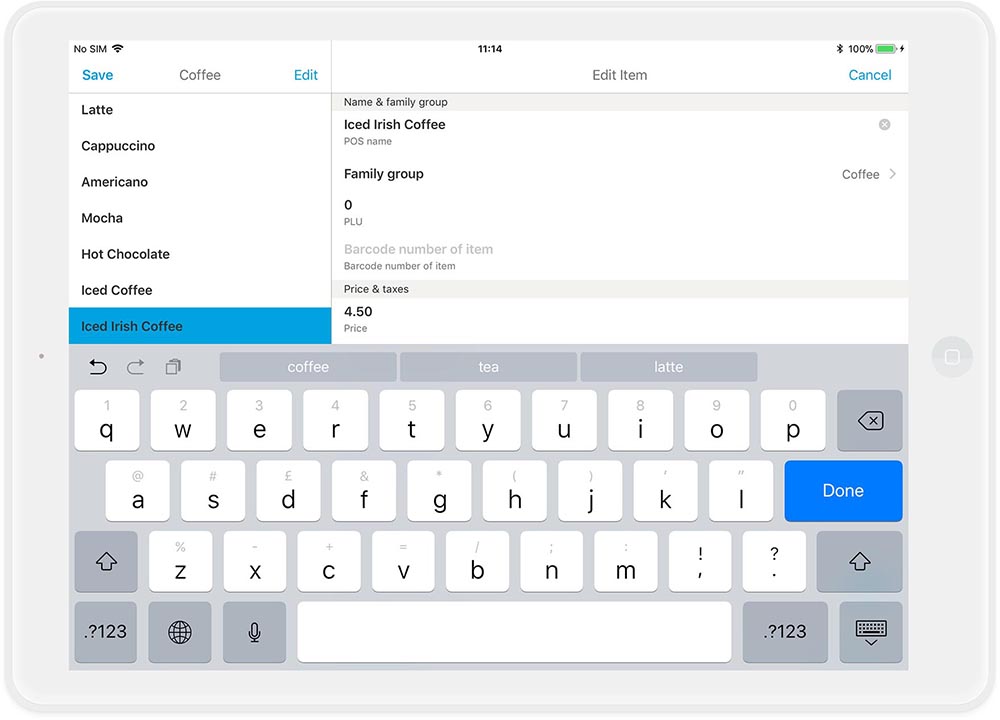
That’s it!