
You have just unpacked your devices. Now you are wondering where and how to connect your cash drawer? Just read on :)
Connect your cash drawer to your invoice printer. The correct connection to the printer is indicated by a small cash drawer symbol on your printer.
Exclusively for iPad
The cash drawer can only be controlled via iPad. You cannot open the cash drawer via iPod or iPhone.
Do you have an Epson TM-T20 or an Epson TM-M30 as invoice printer? Click on the picture of your printer to get to the instructions:

Step by step: TM-T20
The port for a cash drawer is in the bottom left corner of the backside of the printer: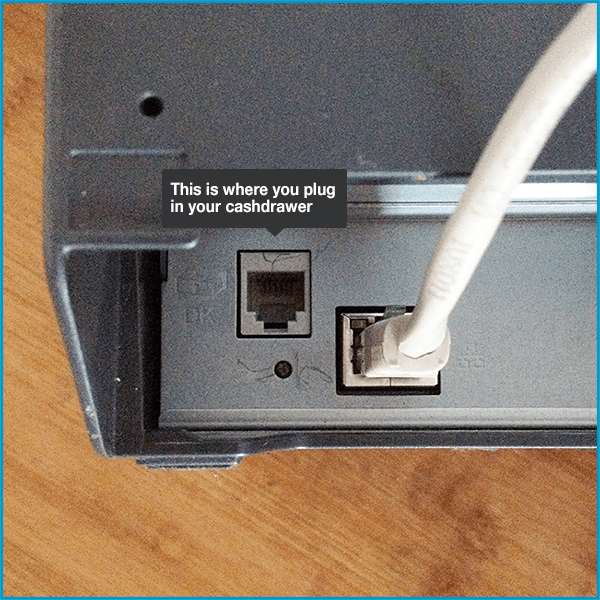
- Make sure your printer is turned off.
- Connect the cash drawer cable to the printer's port, which is marked with a small cash drawer icon (see photo above).
- Turn your printer back on.
- Open your orderbird app and go to Settings > Payment > Payment methods and select for which payment methods the cash drawer should pop open.
For example, it makes sense to activate this for cash payments and deactivate it for card payments.
- All done :)
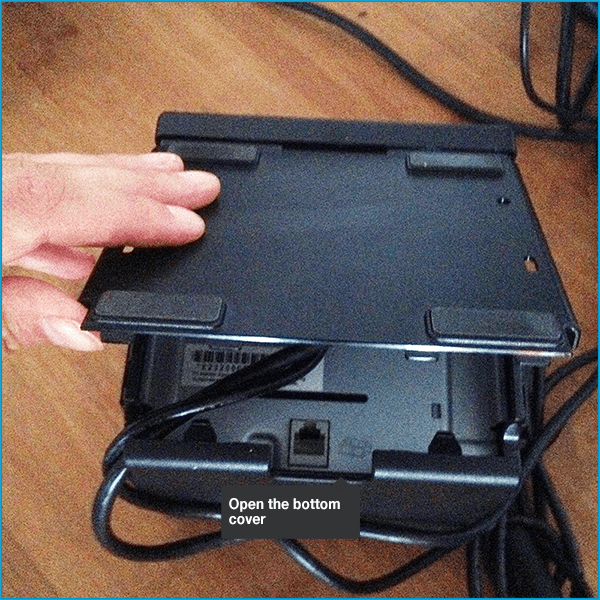
Step by step: TM-M30
- Make sure your printer is turned off.
- First, remove the black bottom cover.
- Connect the cash drawer cable to your printer's port, which is marked with a small cash drawer icon.

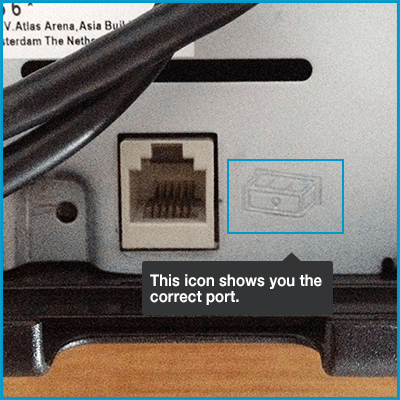
- Turn your printer back on.
- Open your orderbird app and go to Settings > Payment > Payment methods and select for which payment methods the cash drawer should pop open.
For example, it makes sense to activate this for cash payments and deactivate it for card payments.
- All done :)