
You're finally holding the welcome letter from Nexi Germany and your new card reader in your hand and want to offer your guests the convenience of cashless payment?
Learn how to wirelessly connect the card reader to your Apple device and make your first test booking with.
In a nutshell
- Check and update the iOS
- Pair your card reader with your Apple device via Bluetooth
- Make a test transaction
- Run the key generation
Important to know
When you recover an invoice that has been settled with card payment, the amount is automatically returned to the cardholder. The amount can then only be debited by a new payment process!
Before you start
A few tips for when you receive your card reader
- Accept the packaging only if it is undamaged and shows no signs of prior opening.
- Open the package with the card reader and note the serial number (S/N) in your documents.
- Keep all documents of the card reader for possible warranty claims
Before using the card reader
Check if your card reader has any kind of manipulation, e.g. loose or missing screws, an unusual appearance like cables that were not attached before. If so, stop using your card reader and contact us immediately: help@orderbird.com.
See also Important Security Notes for your card reader.
Let's go!
Check and update iOS
Before you connect the two devices, please check that you have the latest operating system (iOS) installed on your Apple device. To be able to accept cashless payment, the iOS version running on your Apple device must be more recent than iOS 9.3.5. Even better is the latest iOS, as there are problems with iOS 10.0, for example.
Apple explains how to identify the current running iOS version: Find the software version on your iPhone, iPad, or iPod (https://support.apple.com/en-us/HT201685).
Learn how to update here: Update your iPhone, iPad, or iPod touch (https://support.apple.com/en-us/HT204204).
Pairing…
For security reasons, the card reader can only be permanently coupled to one device. Select the Apple device you want to connect the card reader to.
- Make sure that you have no open shift in orderbird.
- Close the orderbird app.
- Turn on your card reader by pressing and holding the blue button on the top right of the card reader for 2 seconds. The display lights up, and your card reader starts up.
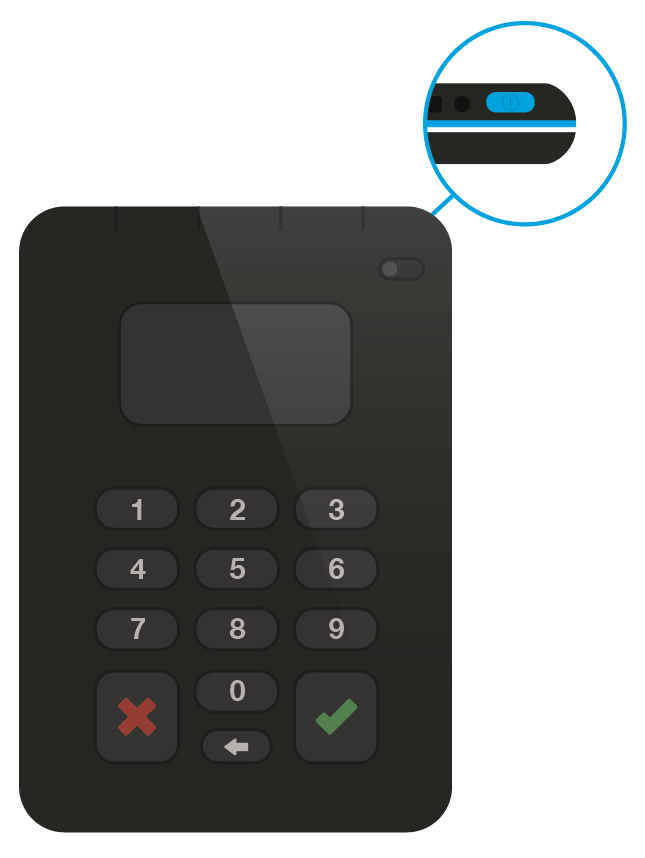
- Once the Nexi Germany logo and Bluetooth icon appear in the upper left corner of the display and the blue Bluetooth light in the upper right corner flashes quickly, you can pair the two devices.

- Go to the settings on your Apple device, select "Bluetooth" and activate Bluetooth.
- A new entry appears in the list "Devices", consisting of the word "orderbird" and the last six digits of the serial number of your card reader, e.g. "005960".
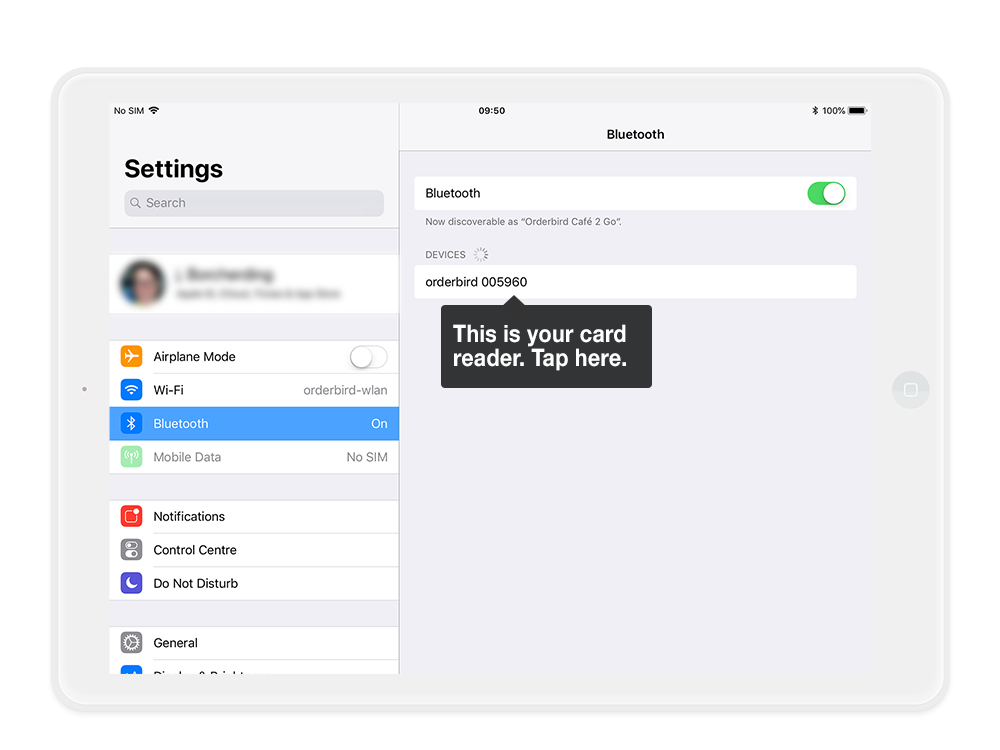
- Tap on this entry and confirm the pairing. On the Apple device…
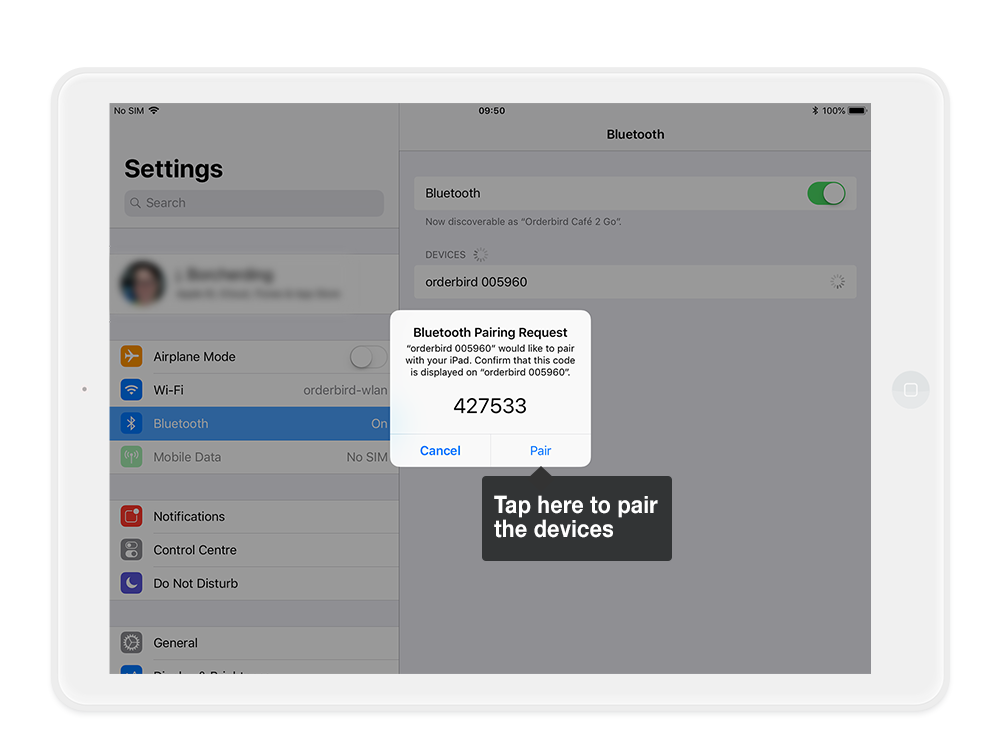
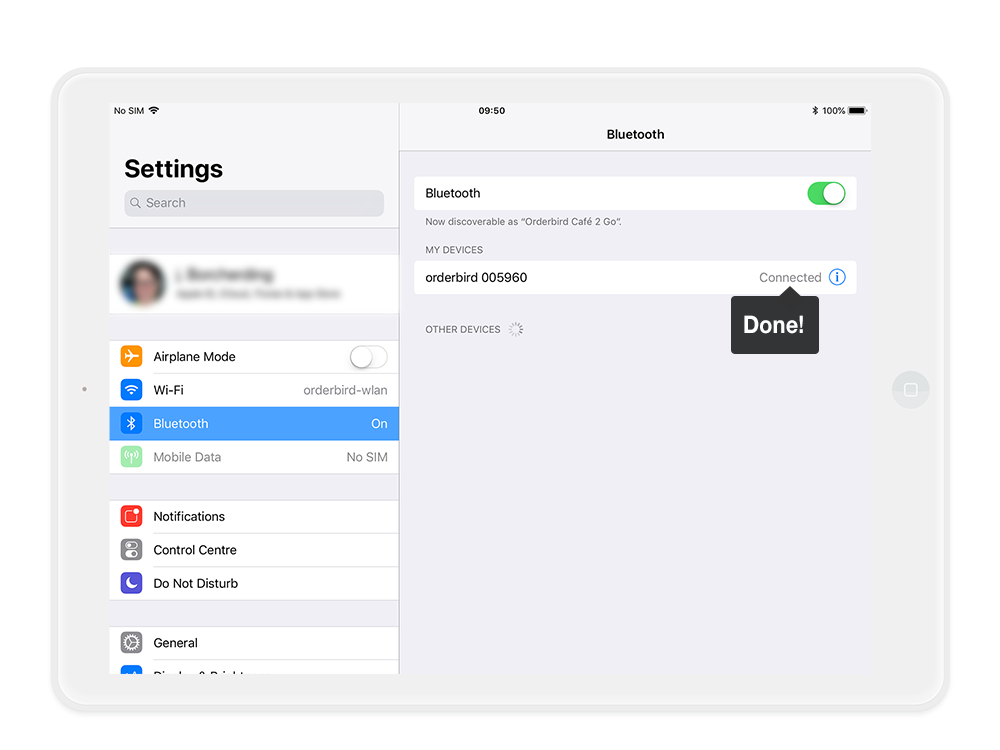
… and on the card reader. Simply press the button with the green tick on the card reader, once the 6-digit-code is displayed on your card reader. - Now your Apple device is connected to your card reader!
... and getting started
To check the connection, let's make a test transaction.
- Open the orderbird app, start a shift and go to the orderpad to order an item.
- Now tap on the three dots to access the payment options. Select "Pay" in the new window at the bottom of the screen and then "Card payment" in the next step.
- Now the amount is automatically communicated to the card reader.
- Your first transaction after pairing will take a little longer. Be patient.
"Schlüsselerzeugung" ("key generation") is now displayed on your card reader, which ensures that the card reader cannot simply be connected to another device if it is lost. - Now the card reader asks for the card. There are three possibilities:
- The card can be inserted into the device from below,
- pulled through at the top end; or
- if it has an NFC (Near Field Communication) mark for contactless payment, simply hold it near the device within a 25 cm radius.
- Now the payment has to be authorized: Enter the PIN
Please note, that there is a small special feature for payments via NFC procedure: No PIN is requested for payments up to €25. - As soon as "Payment successful" is shown on the reader's display, the payment is accepted.
Congratulations, you just made your first cashless payment!
You can immediately restore this invoice in "Payments" in orderbird's main menu, and your card will no longer be charged. This is super convenient if a customer gave you a wrong card and now wants to pay with another card. So make sure that these restored invoices are always paid again, with a card or another payment method!
Your cash register is now ready!
You have taken all the first steps with your new orderbird cash register!
For all other questions about orderbird that have not been answered here, you will find the appropriate answers in this section: "Working with orderbird PRO".
Have a successful start with orderbird and enjoy exploring your new cash register!