
You’ve set up your orderbird PRO register. Now is the time to familiarize yourself with your new system :)
In a nutshell
- Taking orders: In the orderpad, tap on the item you want to order
-
Multiple orders: Tap on the calculator icon below, enter the quantity and then tap on the item to book it several times as entered
Alternative: Tap on the article as often as you need it - Immediate cancellation & cancellation: Swipe, from left to right, over an item when it appears in the order list on the left side
- Fast payment: Tap the green button in the bottom right corner
- Payment Options: Tap the green button with the three white dots "…"
Here we go!
Create a new shift
Before we start, let's start a new shift first:
- Go to the main menu of orderbird
- Tap shift > Begin shift
- Now tap on "Orderpad" in the main menu.
A brief overview of what is about to happen next:
- Your digital orderpad
- Selecting a table
- Taking an order - ordering articles
- Taking orders for several parties
- Voids and cancellations
- Immediate order changes: removals
- Invoicing
Please use the table of contents to navigate or simply continue reading …
Your digital orderpad
On the left side, you can see a list of your serviced tables, which is still empty. On the right side of your orderbird screen, you will find the floor plan. You can find out how to create your unique floor plan here: Working with the floor plan.
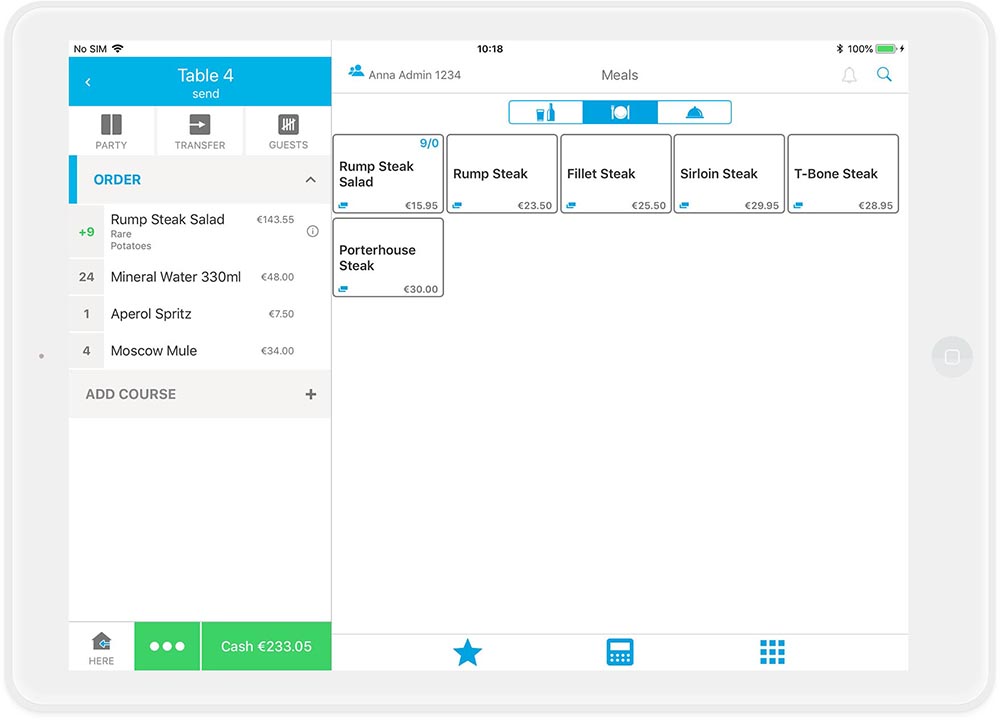
Now tap on the "Menu" tab to call up your menu. Your articles are grouped by the three product (superfamily) groups "Beverages","Food" or "Miscellaneous".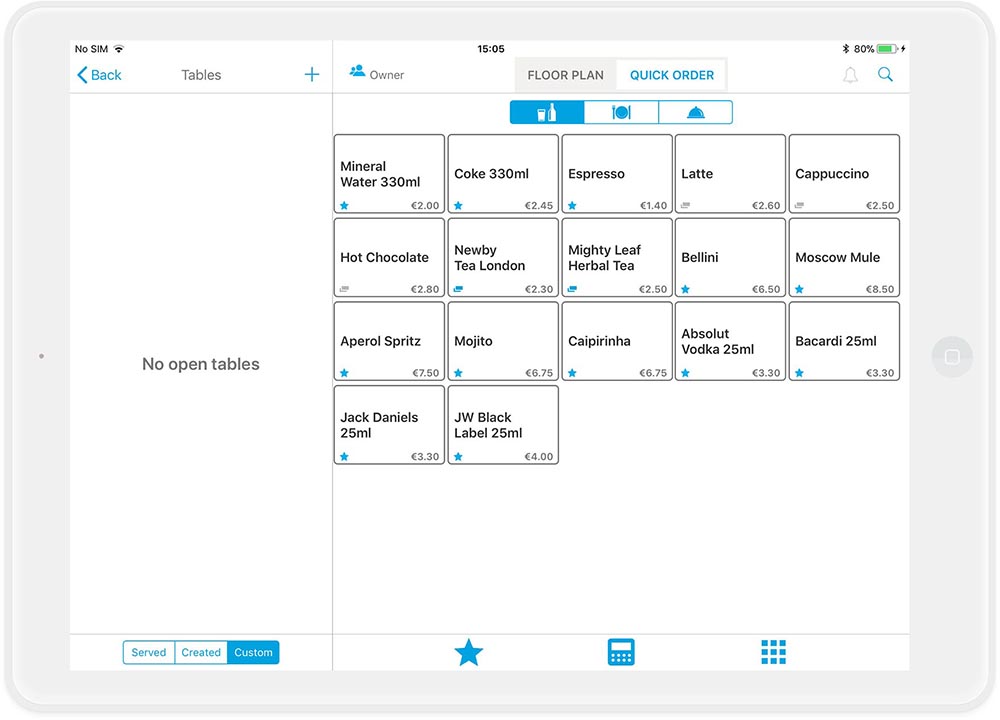
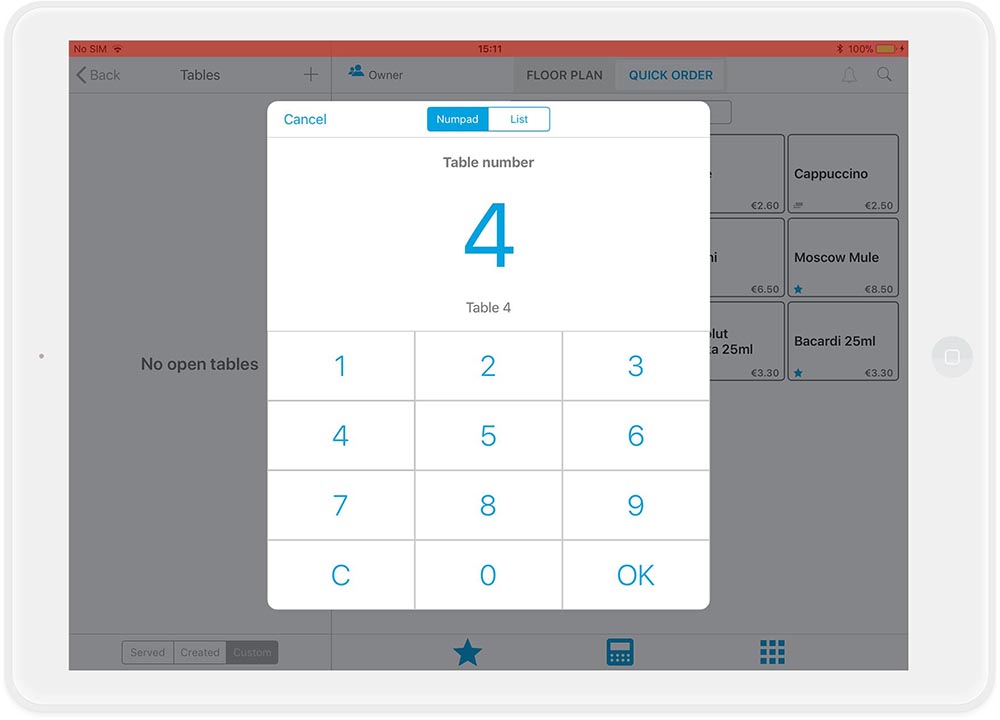
Selecting a table
Before you start taking an order, tap the blue plus sign "+" located top left to open a new table: Select the table by entering a number or choose from a list. (You can set your preference in the two tabs on top). In our example, we'll be serving the guests at table 4.
Taking an order - How to order articles
How do I order a single article?
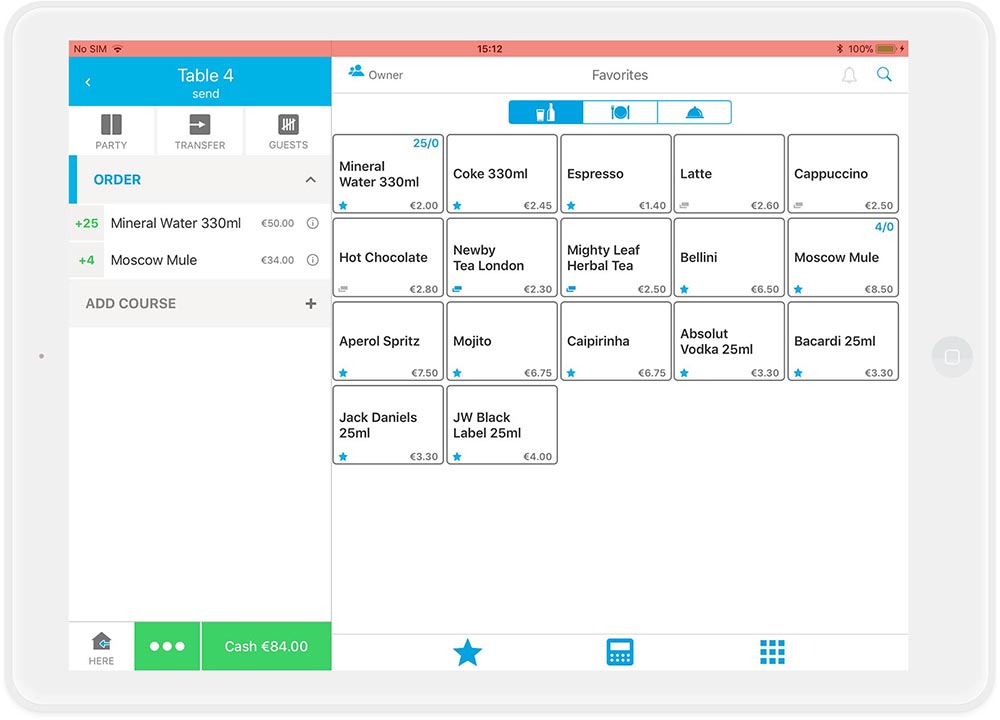
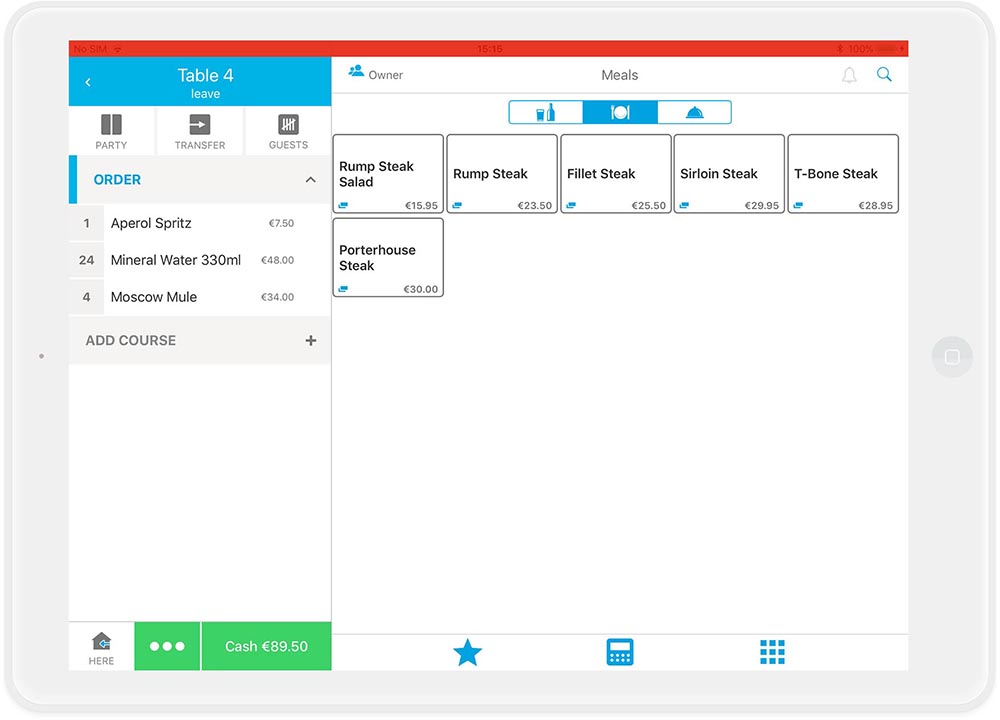
You can order articles by tapping on the name of the article once, e. g. on "Moscow Mule". On the left side, in the table overview, you can see that the article appears with a “+1”.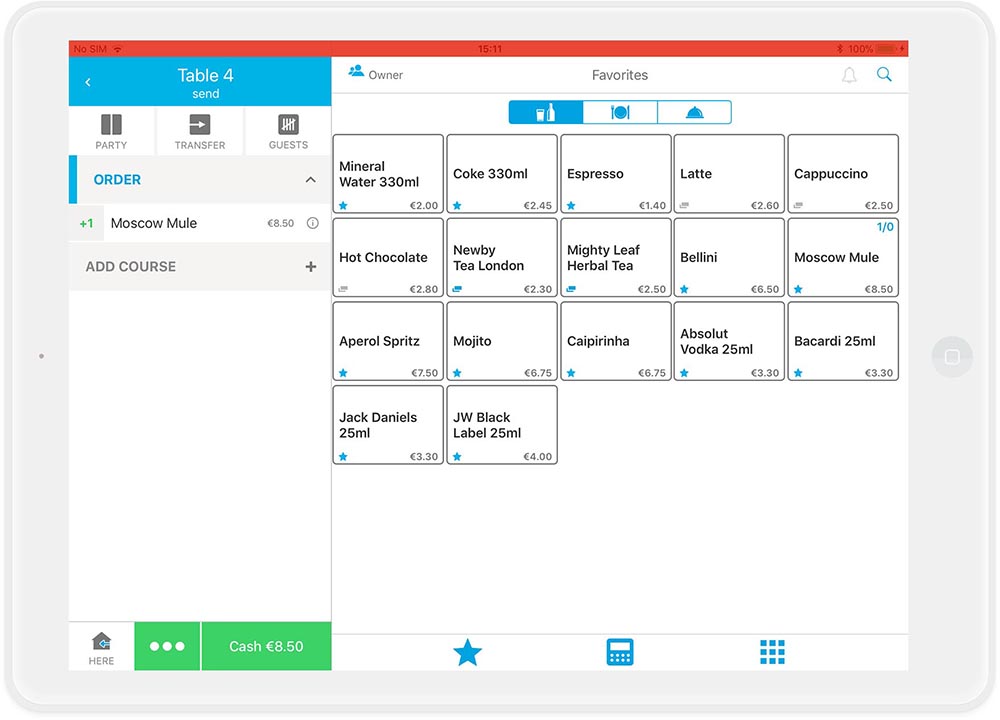
If your guests, one after the other, now tell you "Oh, I'll have one, too!", then you just tap on the article again to order a second, a third Moscow Mule. It is also possible to just tap on the article listed in the order overview on the left to add one.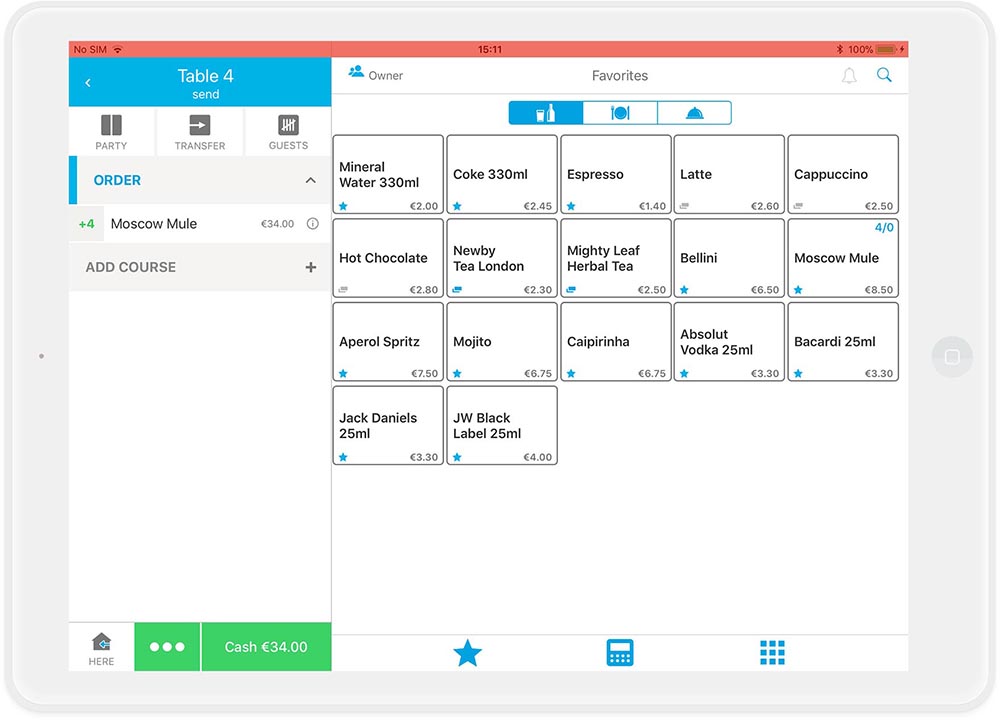
How do I order several articles at once?
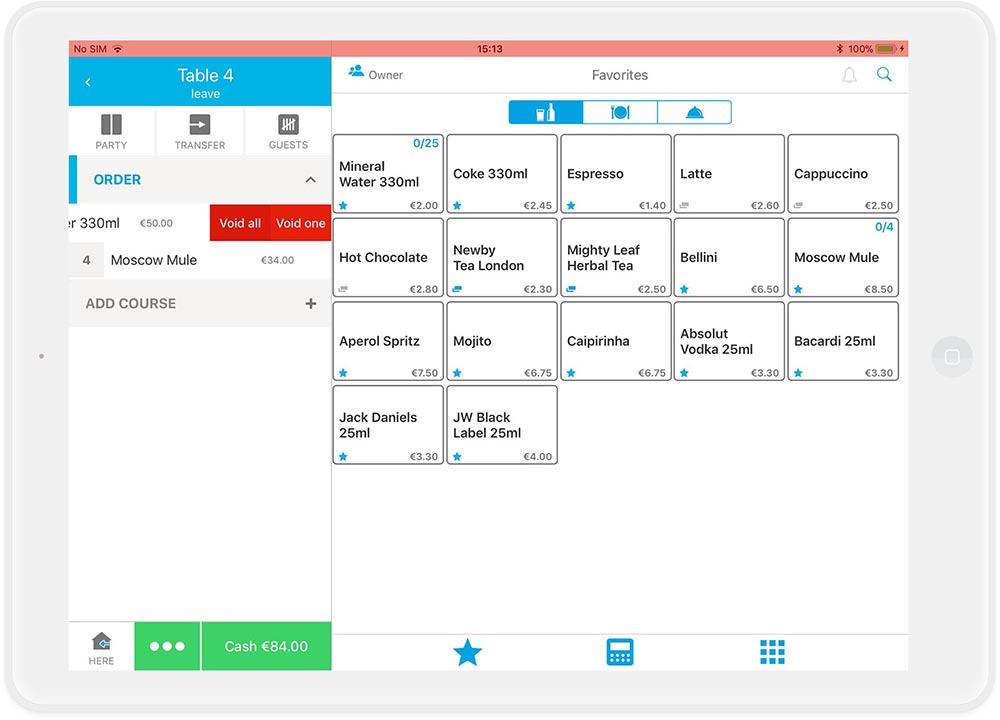
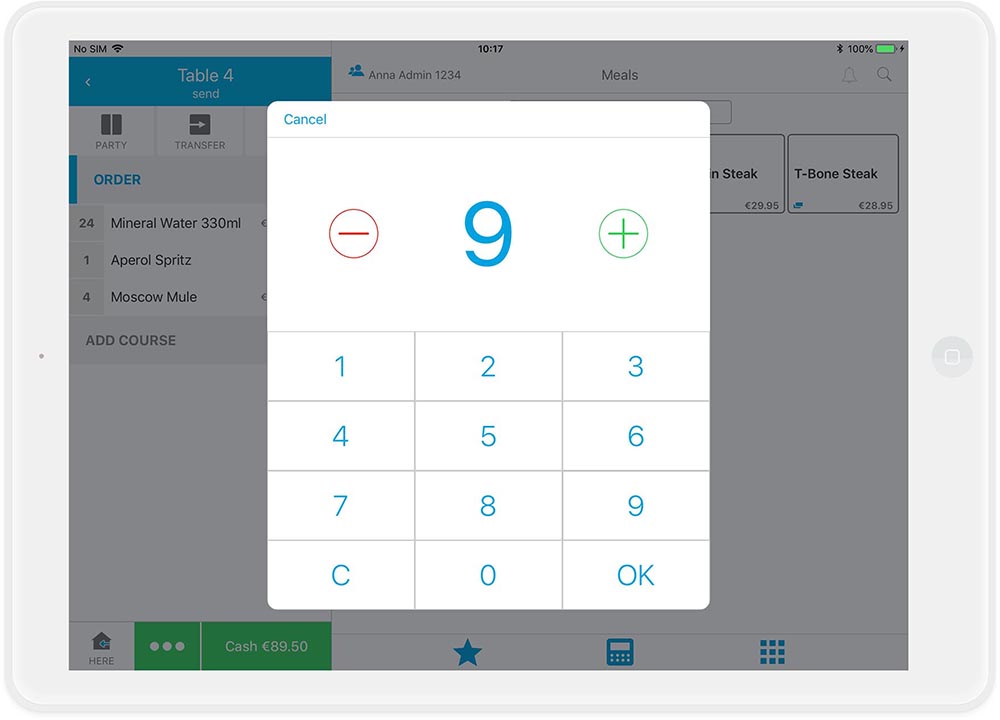
If you have to book a larger quantity, e.g. 25 Mineral Water, then you don't have to tap on the article for 25 times. Instead, use the blue calculator symbol: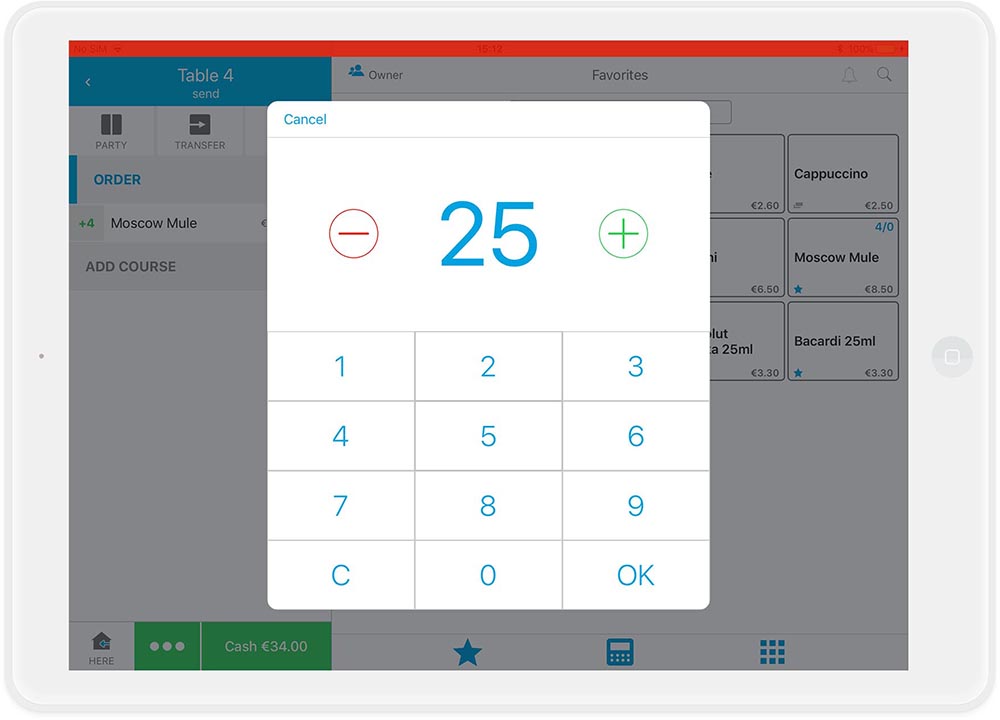
You enter the quantity using the numpad, then press "OK" and then select the article: Et voilá, 25 Mineral Water are ordered!
Place your order by tapping on the blue box "Table 4 send" in the upper left corner. The counter now receives a production docket for the drinks to be prepared.
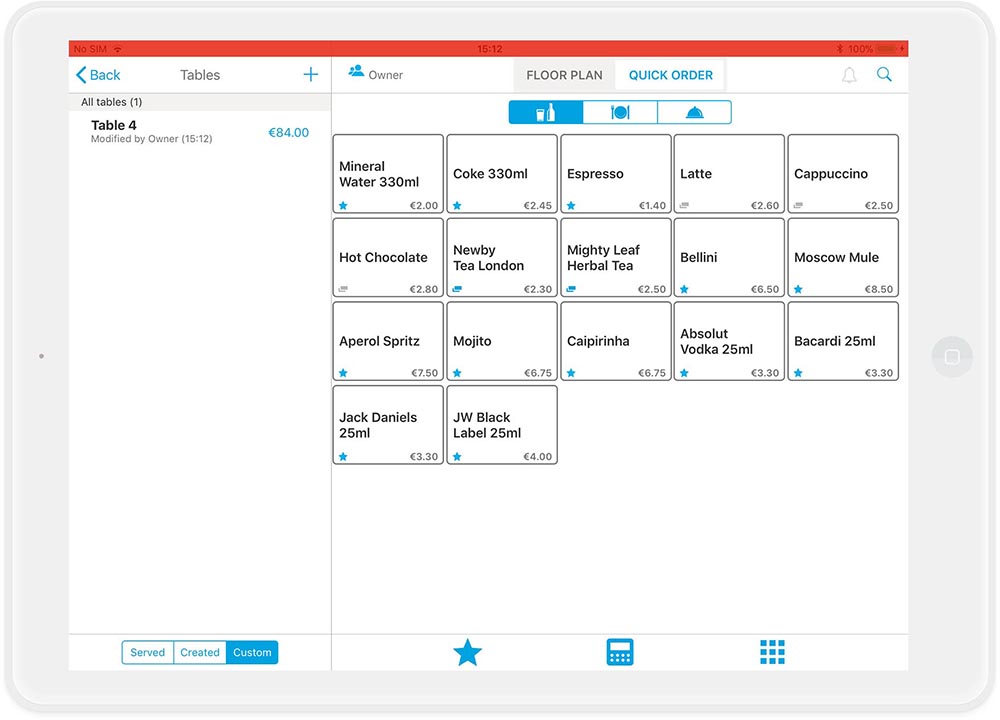
You see your open tables in a list:
Taking orders for several parties
If there are different groups sharing a table that want to order and pay separately, you can place the orders on separate parties.
- First select the table, where the parties are sitting.
- Then tap on the button “PARTY" in the upper left corner.
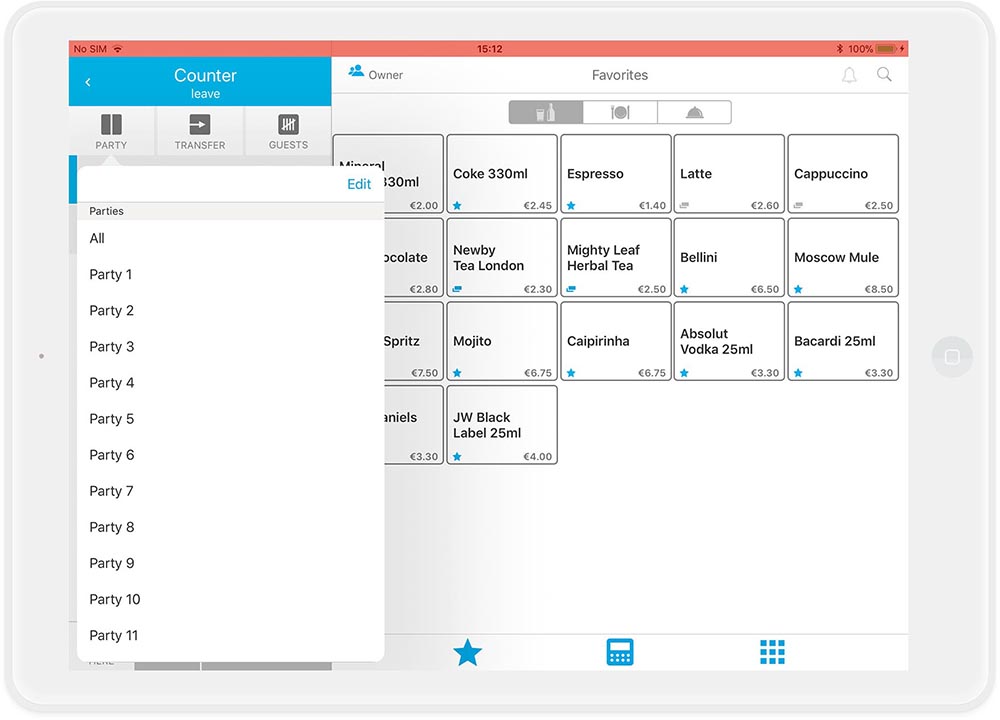
- Choose the party you are taking orders for. Everything you order now will be assigned to the selected party.
When you re-open a table with parties, you see an overview of all parties with the number of ordered items: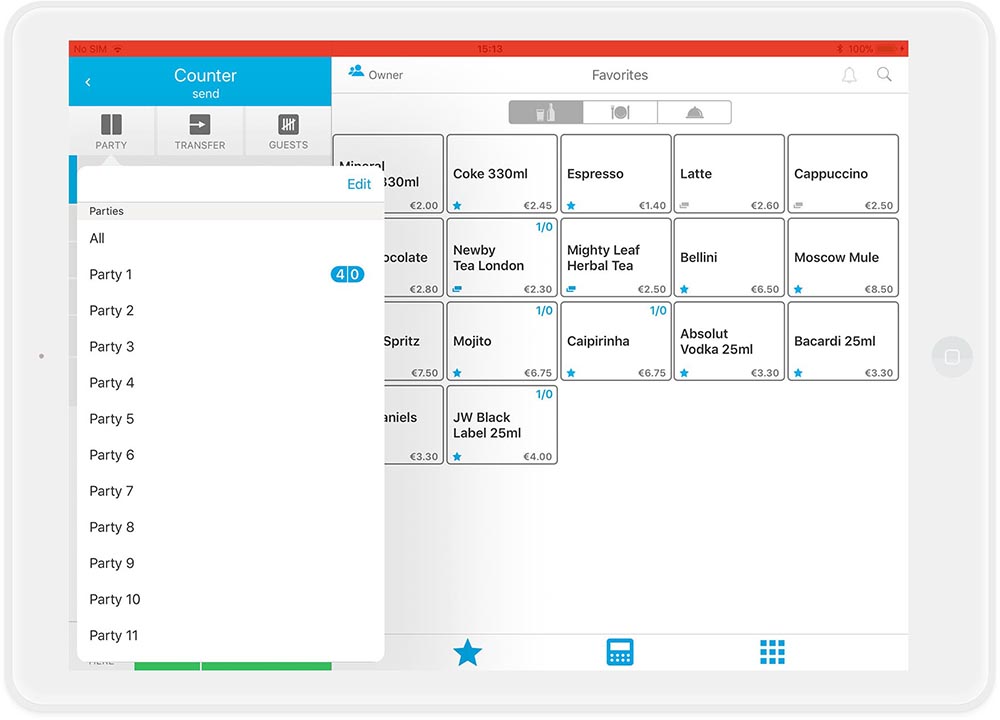

Repeat steps 2 and 3 until you have placed the orders for all parties. It is of course possible to create a single invoice for each party.
If you click on "Edit" in the overview of the parties in the upper right corner, you can also give the parties different names to identify them more easily or change their order by moving them up and down.
Voids and cancellations
If you wish to delete an order that has already been sent, you need to cancel it. In our example, one of the guests changed their mind after the order has been sent.
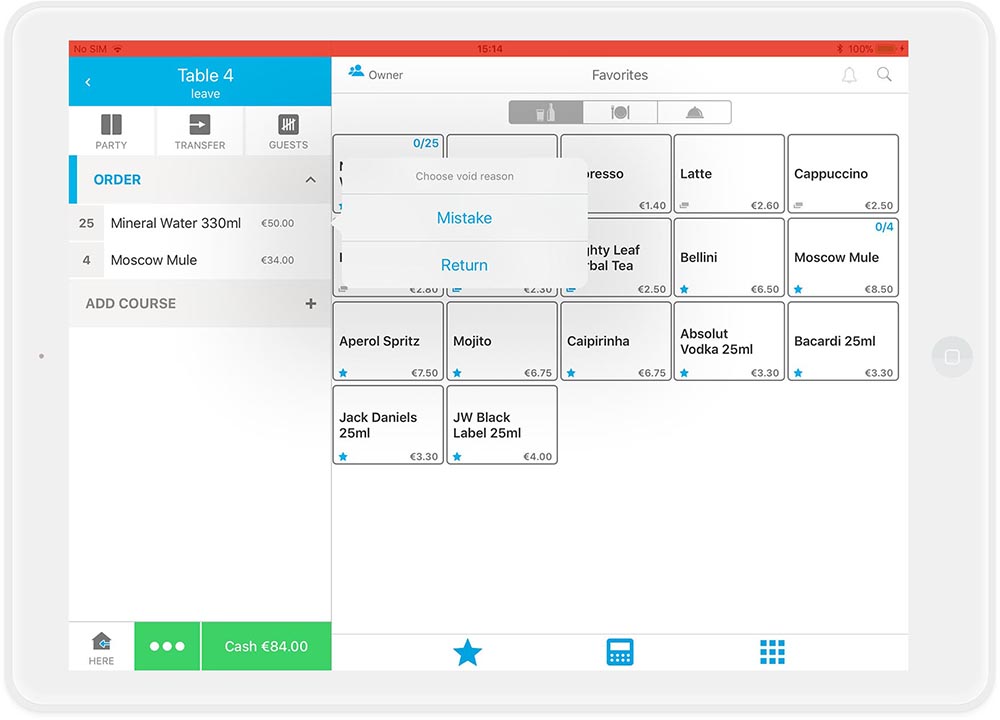
- Go back to your table: In the table overview, tap on Table 4 and you will see the items you have already ordered.
- Swipe from right to left over the name of the article you wish to cancel, in this example mineral water. Now you have the choice of voiding all ordered items or just one item. Once you have made your choice, you must then choose a void reason from the list that opens. This reason is protocolled in the register’s journal.
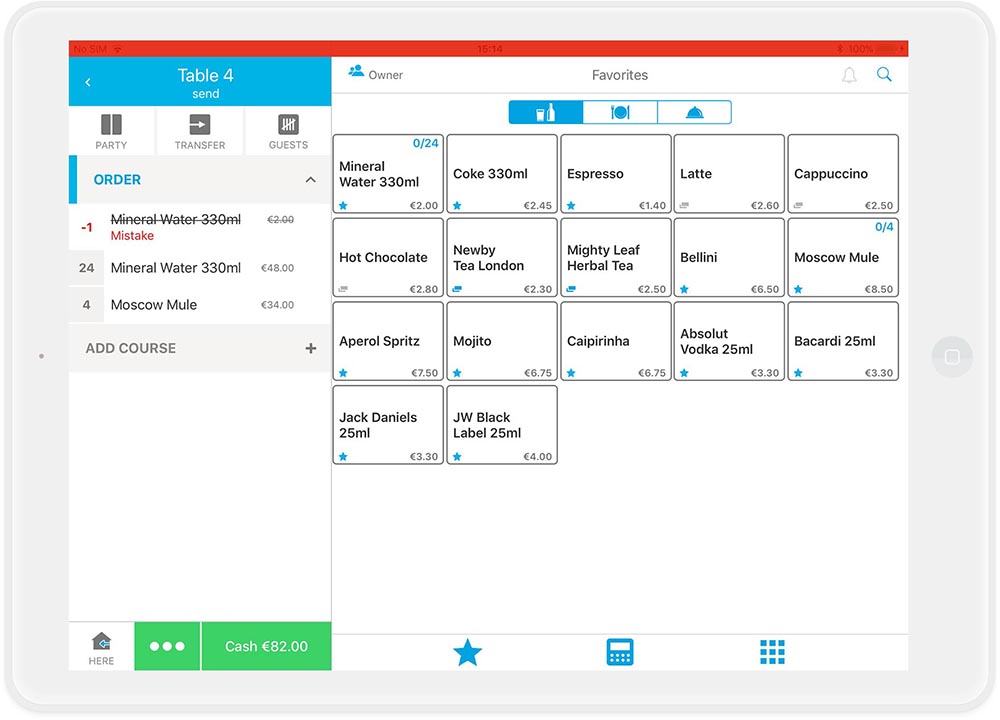
- Now book the new correct article. In this case, an Aperol Spritz:
- That’s it!
Immediate order changes: removals
You haven’t sent the order to the kitchen yet, and you notice you made a mistake while entering it, or a guest changes their mind right away? Good, let’s remove that order and place a new one.
- Instead of nine times "T-Bone Steak", I’ve booked it 99 times, as you can now see on the table list. The number "+99" is still green, which tells you the order has not been sent to the kitchen yet.
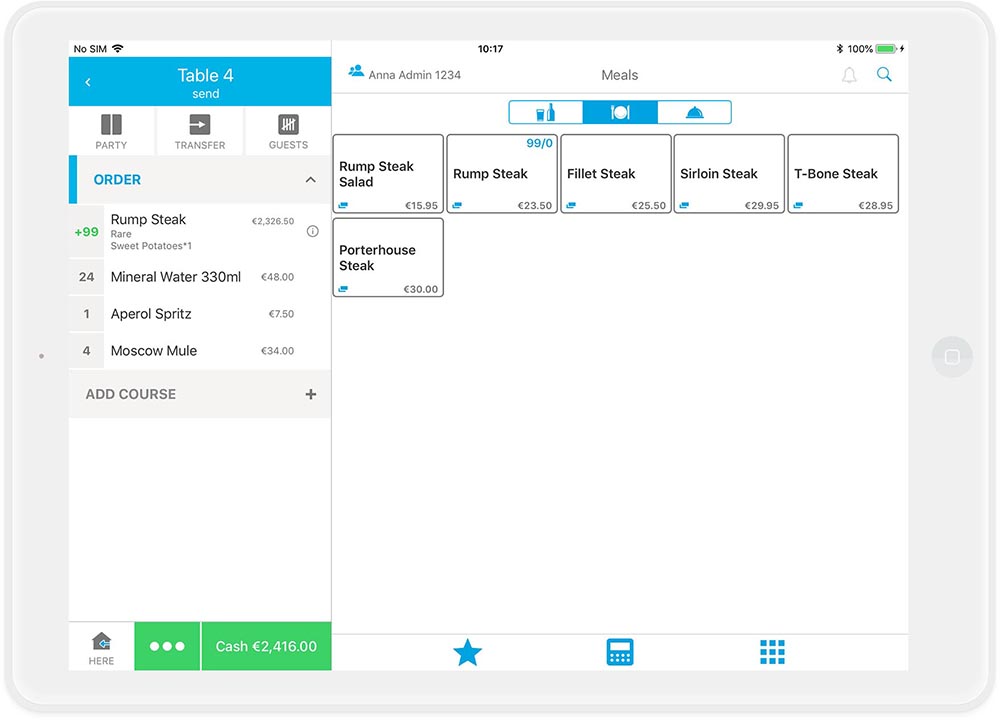
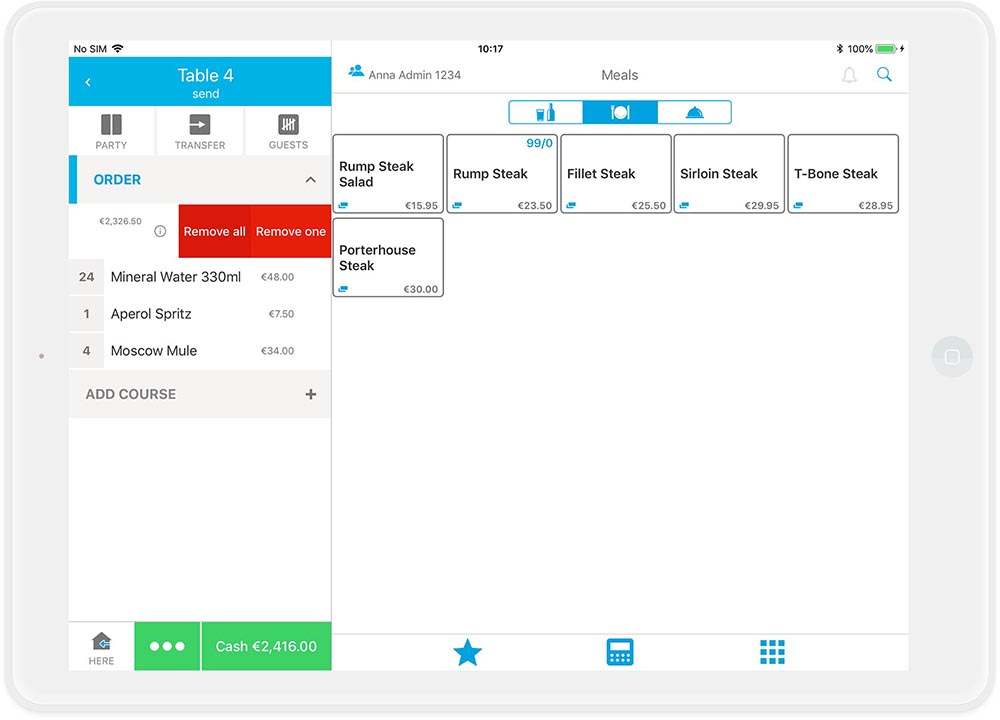
Green numbers show you that these articles have not yet been sent. In this case, I can avoid stress with the kitchen, because I just have to execute an immediate removal. - I swipe once from right to left over the wrongly ordered articles and I see two familiar red buttons with a different text to making a void: “Remove all” and “Remove one”. I delete all the items, because it's much faster to book a steak nine times than deleting 90 steaks :).

- Now I select the nine steaks and place the order.
- That’s it. You do not need to select a reason for a removal. No cancellation docket is printed, because the production dockets have not yet been printed.
Invoicing
Now it’s time to create your first invoice with your new cash register! In this case, many roads lead to Rome! Here, we explain the most common ways to create an invoice.
Decide whether it is an in-house or a take away order
Tap on the house icon in the lower left corner if the order is take-away.
Option 1: Fast payment
You will use this invoicing type the most. In our example, you tap on "Cash 233,50 €" on the bottom left green highlighted button. An invoice will be printed and you can bill your guests.
Option 2: Everything else :)
All other payment methods that are not listed under Fast Payment can be accessed via the three white dots to the left of the fast payment.
Here you can:
-
Enter a tip or use a different payment method
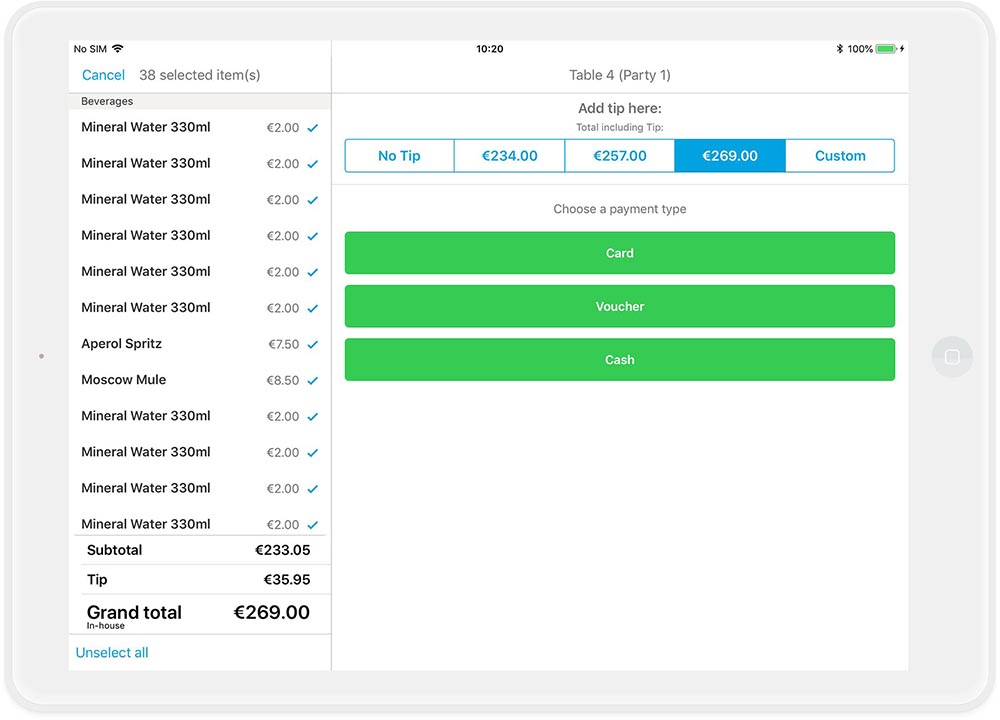
Tap on the three white dots, then on "Pay". You can then add your tip in the upper area and select the desired payment method.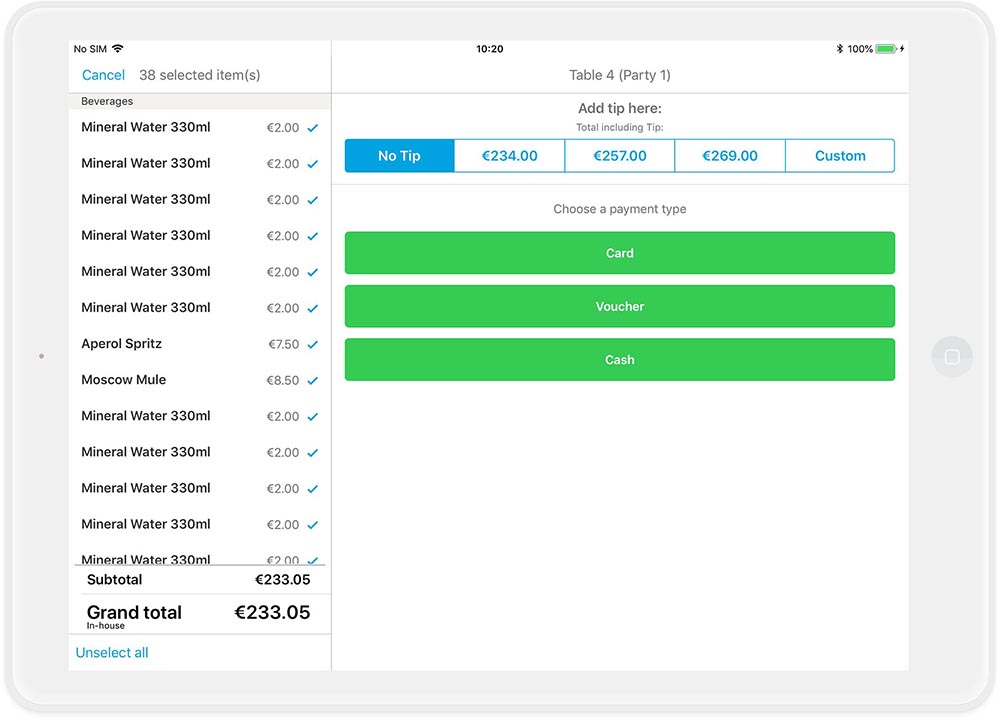
-
Split invoice
Your guests want to pay separately? Then tap on the three white dots. In the left column, all ordered items are listed with a check mark. Anything with a check mark is part of the current invoice. If you tap on one article, it is deselected and remains on the table - it will not be part of the invoice.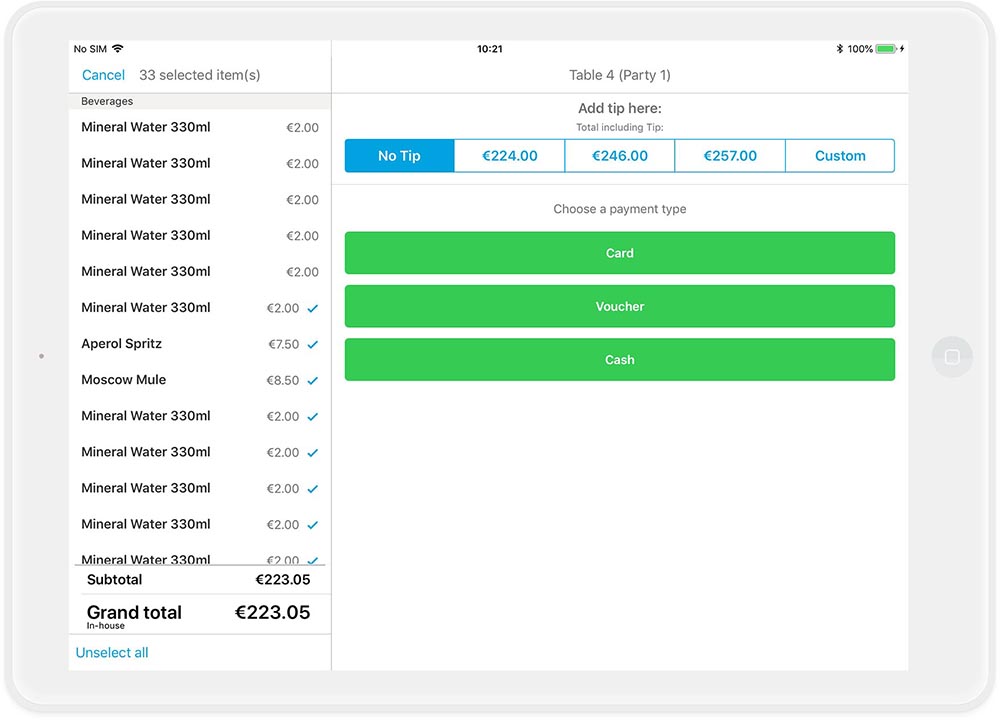
If you have a long list of items, it is recommended that you uncheck all items by tapping on “Unselect all” in the bottom left corner.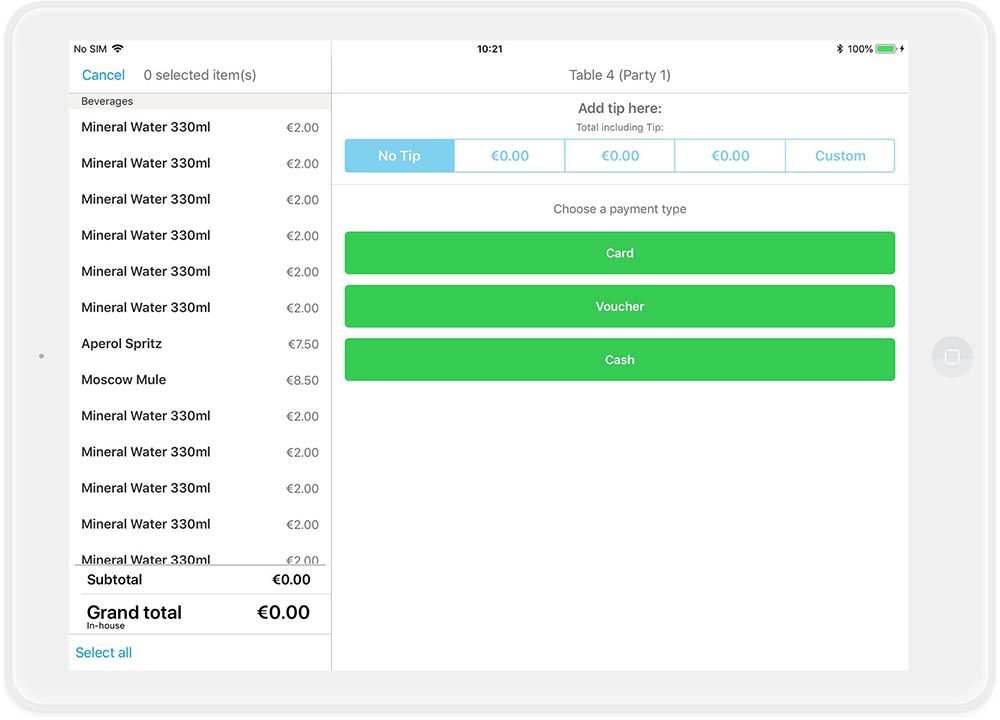
After doing so, simply add items to the invoice with a single tap on the items. In this way, you can easily create an invoice with your selected items.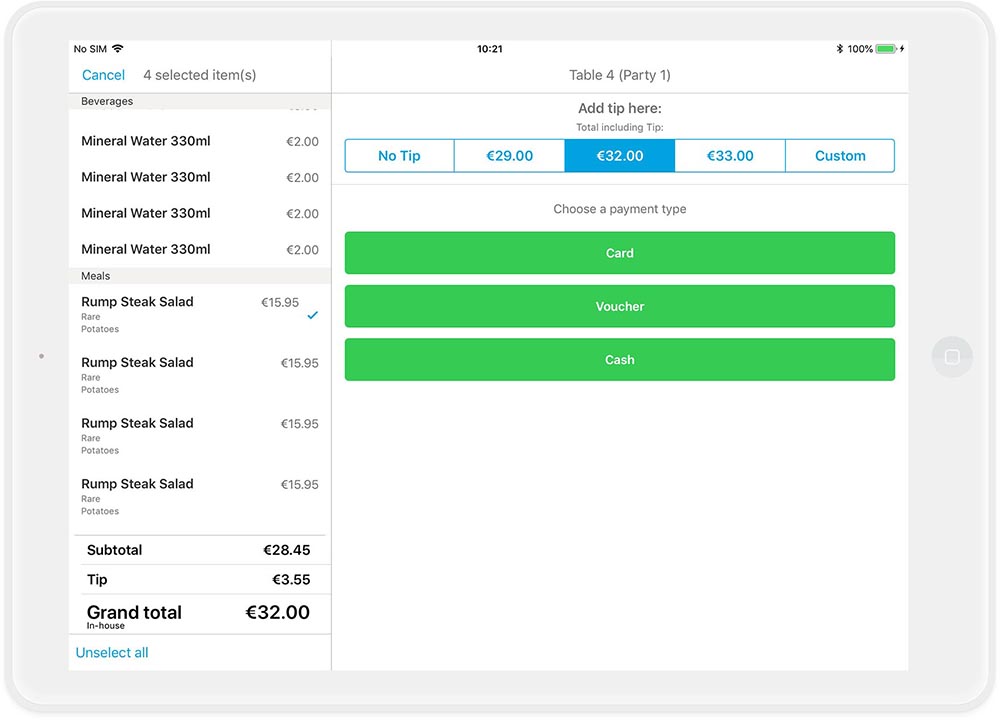
You can add a tip and choose the payment type. - Ready!

Next step
We're close to the finish line! Next, we'll practice calling it a day:) - How to close a shift!