Step 3.3: Printer Settings - The Basics

Table of Contents
You need production dockets for the kitchen and printed receipts for your guests? Here is how you setup your printer(s) to give you exactly that!
In a nutshell
- In the orderbird app, go to Settings > Printers
- Select the counter printer
- Activate the printer
- Select "Find printer IP automatically" and search for the IP address of the printer.
- Tap "Test Print" in the lower right corner to check if you have selected the correct IP address.
- Save your changes
Step by step
This is how you connect your printers with the orderbird App.
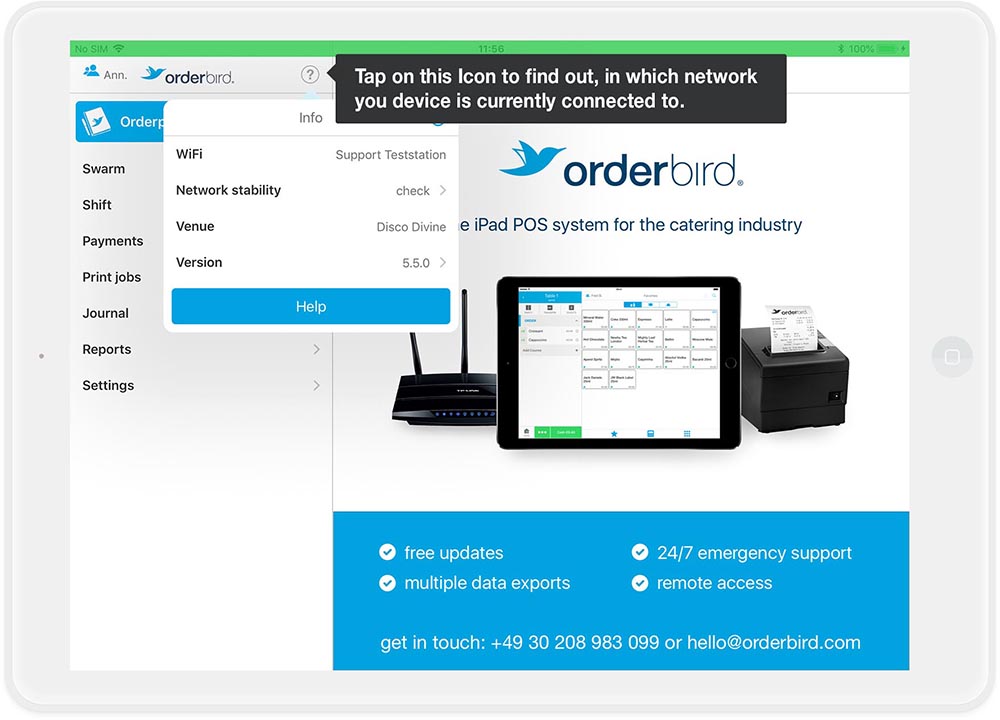
1. Check if you are connected to your orderbird network
Open the orderbird app on your iPad. Tap on the question mark at the top of the main menu of orderbird. “Wi-Fi” shows you, which network you are currently connected to. Is it the correct network? If not, please reconnect to your orderbird network. Not sure, how to connect to a Wi-Fi network?
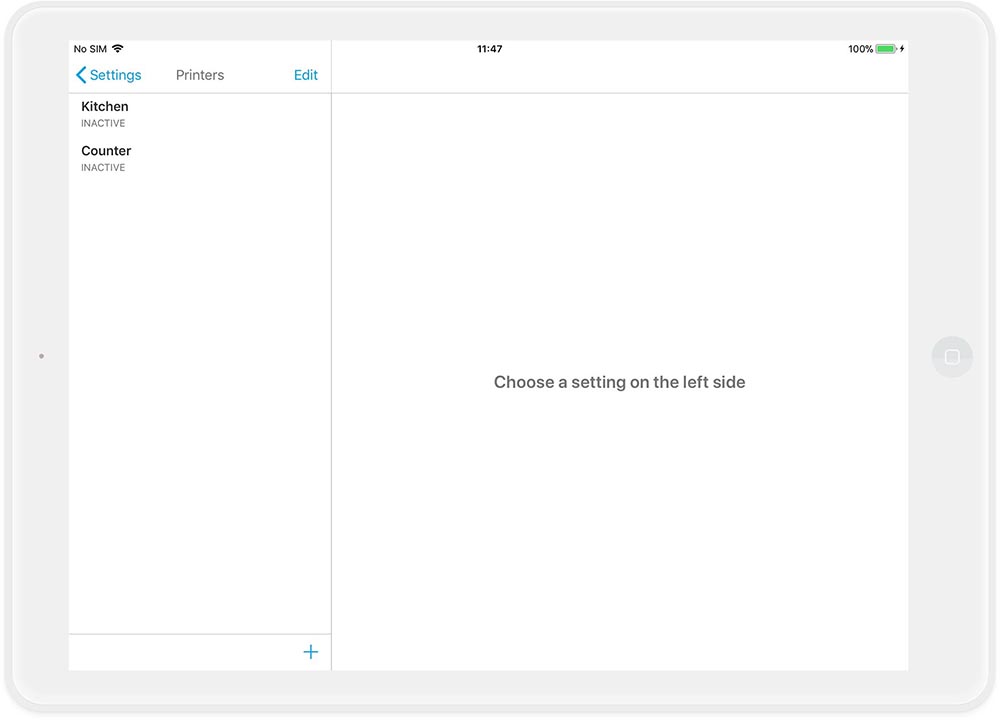
2. Open printer settings
Select "Settings" from the main menu of the app and tap on "Printer" in the next step. You will now see that two default printers are listed. One for your counter and one for your kitchen.
3. Activate the printer in the orderbird app
Select the counter printer from the list of available printers by tapping on it.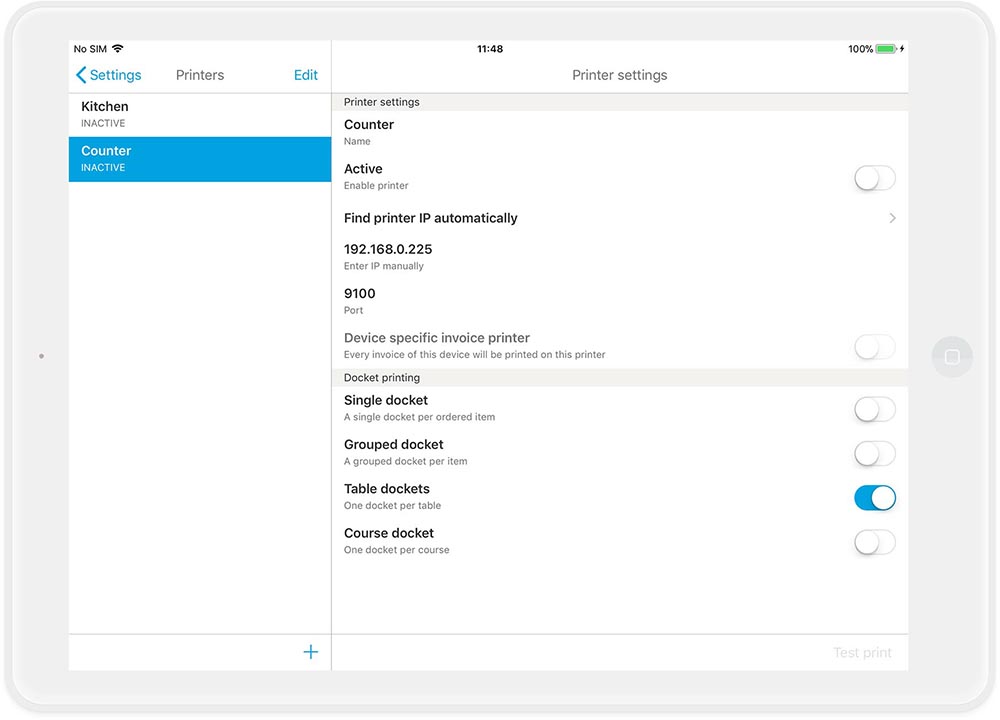
Now you can change the settings on the right side: Drag the slider at "Enable printer" to the right, so it turns blue. This means that the printer is now activated.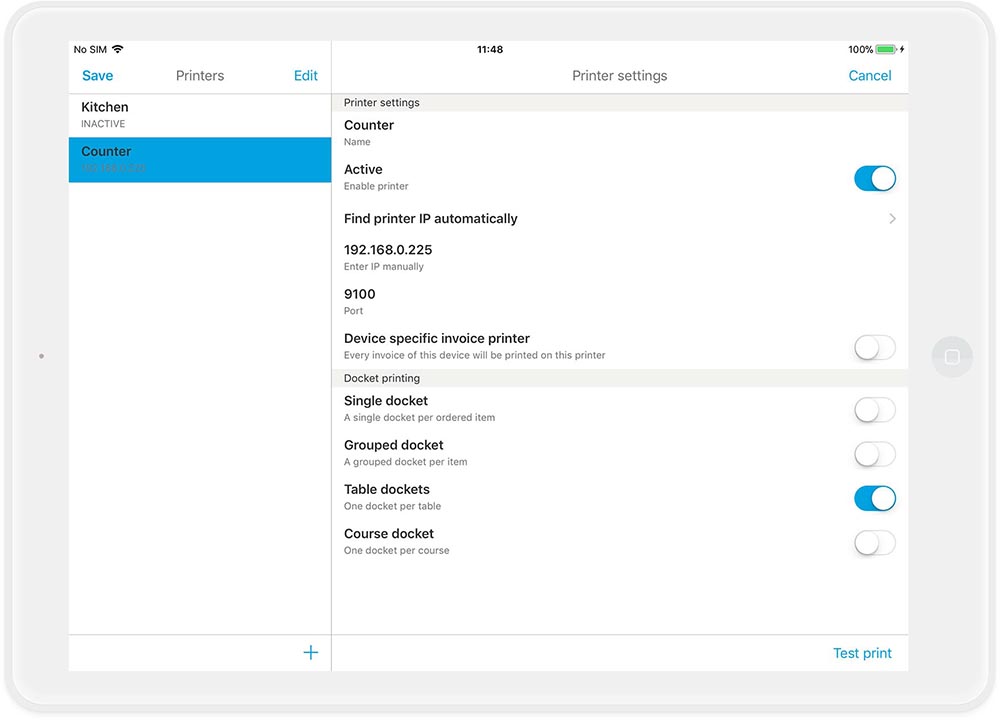
4. Find the IP address of the printer
Tap once on "Find printer IP automatically" and a new window appears.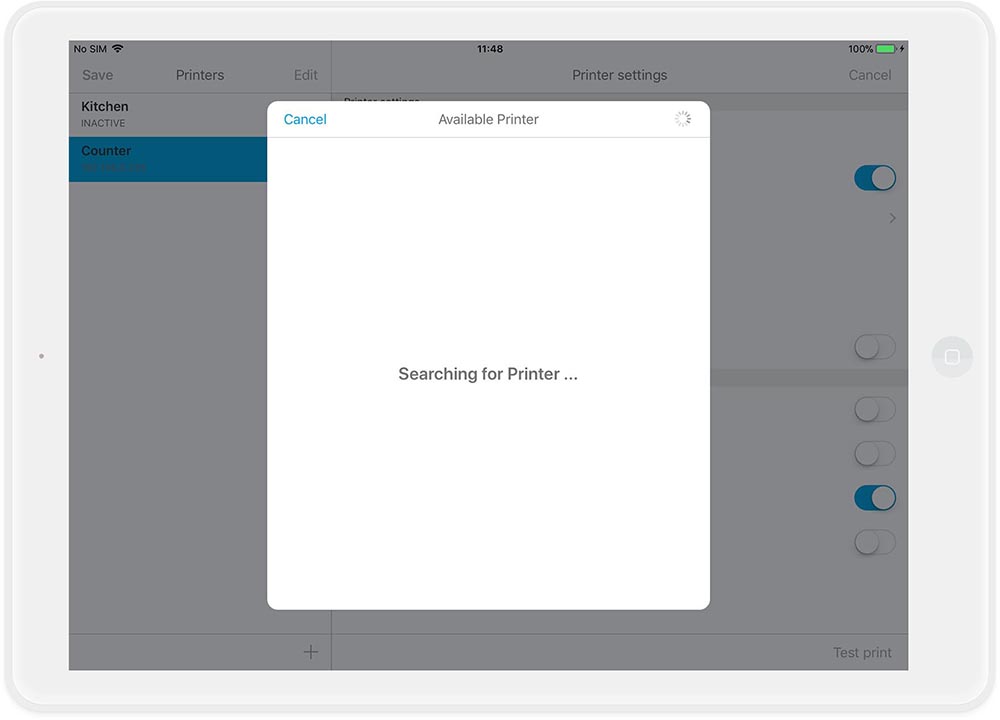
In this window, one or more available printers and their corresponding IPs are listed. Select one of the available IP addresses to connect to a printer.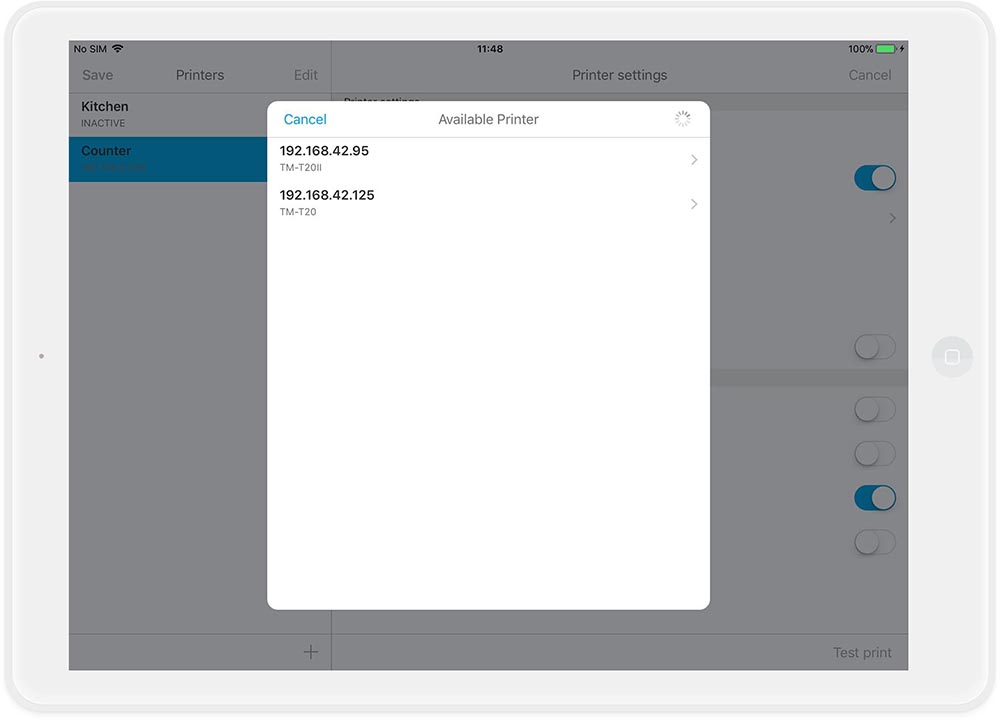

5. Test print
Now let’s test whether you have connected to the right printer and if everything is working correctly. Tap on "Test print" in the lower right corner. A short receipt will be printed from the selected printer.
If the receipt is not printed from the correct printer, repeat steps 3 and 4 and select a different IP address this time.
6. Set up docket printing
In principle, we recommend that you select “table docket”. This setting is used by most of our customers. In these settings, ordered items will be grouped on one docket per table.
7. Set up more printers
Once the first printer is set up correctly, repeat steps 2 to 6 for all of your other printers. If you want to create more printers, use the "+" icon at the bottom left to add as many printers as you need.
If you would like to learn more on how to set up printers, please continue reading here: Printer, docket printing and bill template.
8. Save your changes
You already know this procedure: Click on "Save" in the upper left corner and confirm the changes with "Save" in the following window.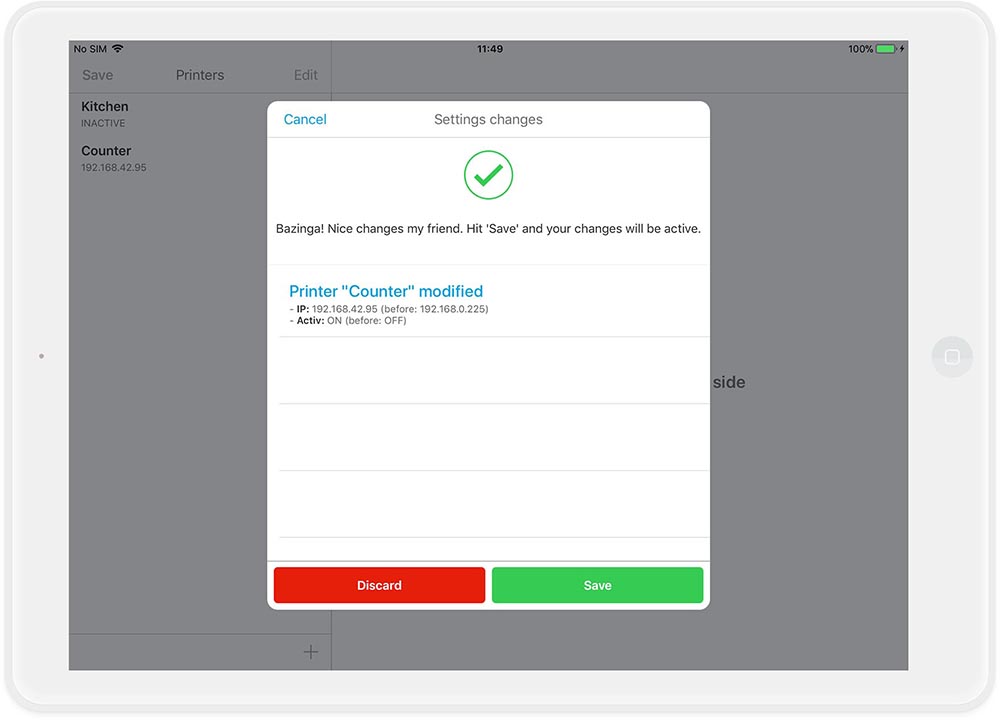
Next step
In the next step, we will show you how to customize your bill template.