Contact Us

If you still have questions or prefer to get help directly from an agent, please submit a request.
We’ll get back to you as soon as possible.

Please fill out the contact form below and we will reply as soon as possible.

  • Knowledge Base MINI
  • Contact us
English (US)
US English (US)
DE German
  • Home
  • Expand your orderbird PRO
  • Bestellmanagement
  • QR Code ordering system
  • First Steps with the orderbird QR-Code ordering system

9. Connect Your Printer(s) to the Bestellmanagement App

Written by Nina Viola Dessi

Updated at July 31st, 2025

Contact Us

If you still have questions or prefer to get help directly from an agent, please submit a request.
We’ll get back to you as soon as possible.

Please fill out the contact form below and we will reply as soon as possible.

  • First Steps
    Hello new Bird! About your Apple devices Step 1: How to set up your network Step 2: MY orderbird Step 3: How to install and set up the app Step 4 - How to serve your first guest Step 5 - Card payment with orderbird PRO
  • Working with orderbird PRO
    Working Settings Fiscalization in Austria (RKSV) "Kassensicherungsverordnung" in Germany orderbird PRO - Versions and Updates
  • Card payment
    Your start with card payment with orderbird PRO and Worldline Your start with card payment with orderbird PRO and Nexi Germany Your start with American Express Working with orderbird card payment Pay Terminal Plus (WiFi card reader) Pay Terminal One (Bluetooth card reader) Card payment on the smartphone
  • Analyze your sales
    Reports on orderbird PRO The DATEV export Reports on MY orderbird
  • Printer & Network
    Printer Network
  • Expand your orderbird PRO
    orderbird PRO Cashbook orderbird Gift Cards Bestellmanagement
  • MY orderbird - Your orderbird business account
    Your account settings on MY orderbird
+ More

Table of Contents

All Devices on the Same Network? Trouble With Test Printing? Der Drucker wird über die Bestellmanagement App nicht gefunden

Next, you need to connect your printers to the QR Code Ordering System so that incoming orders can be printed and processed.

All Devices on the Same Network?

Make sure all devices are connected to the same network: this is the only way they can communicate.

 
  1. Open orderbird PRO and go to “Einstellungen” > “Drucker”.
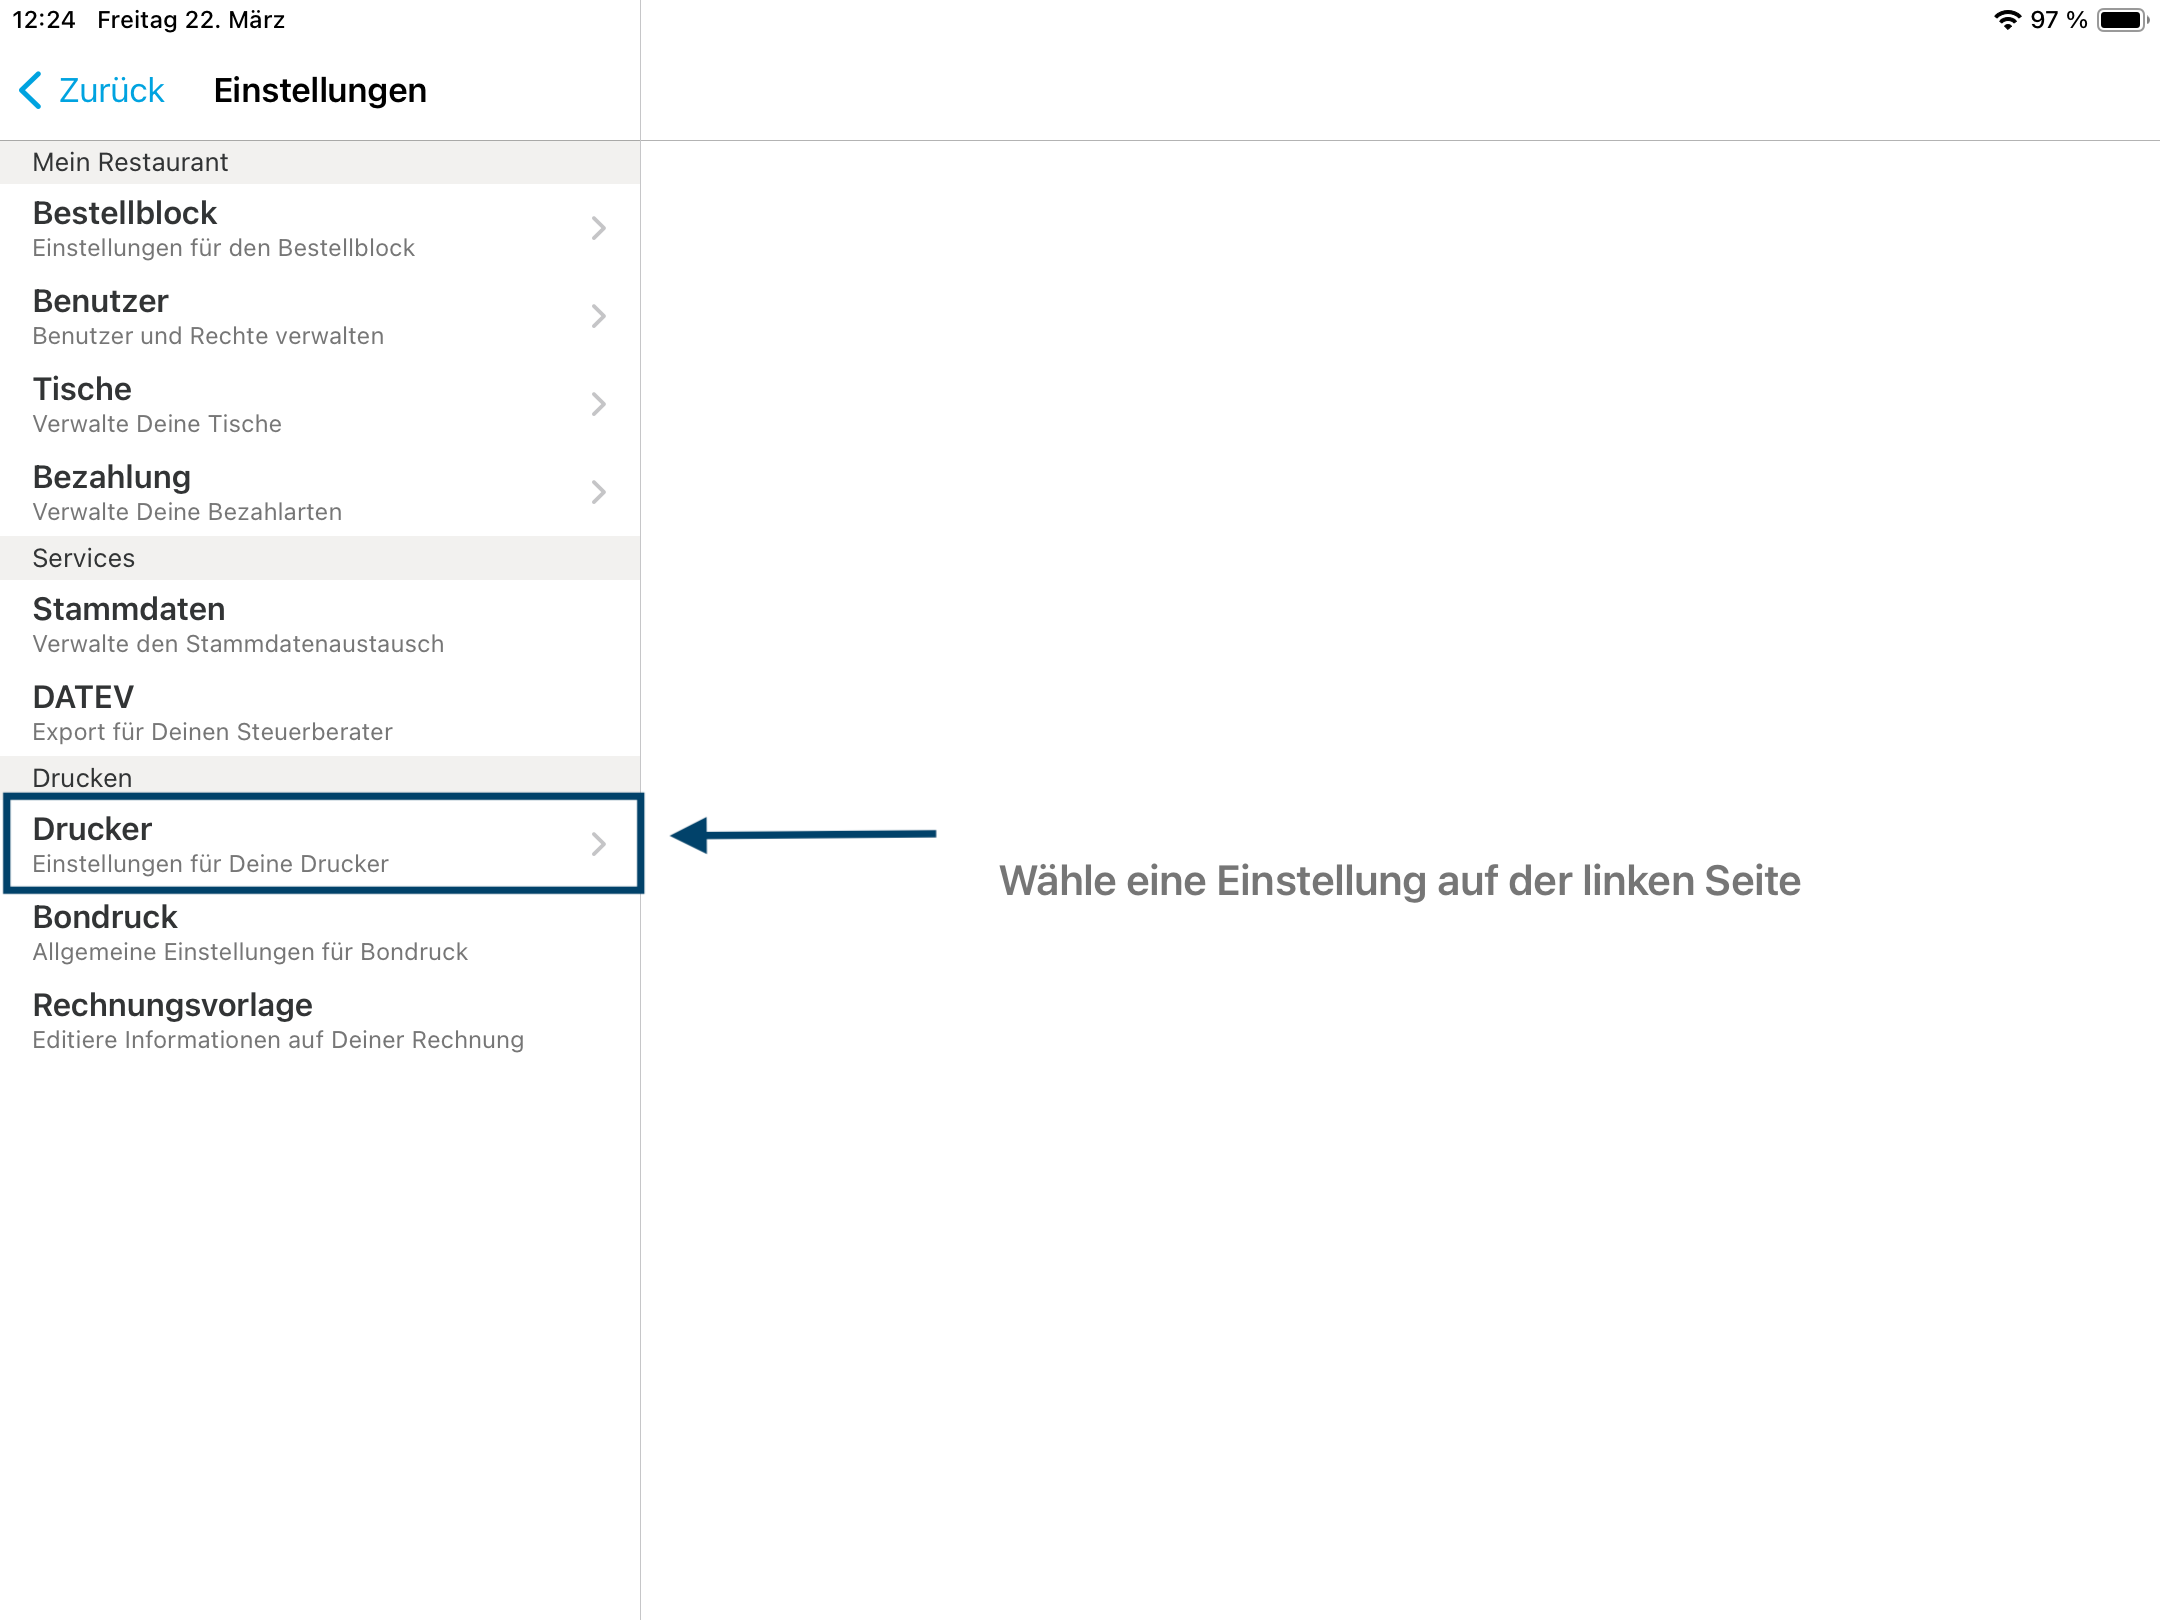
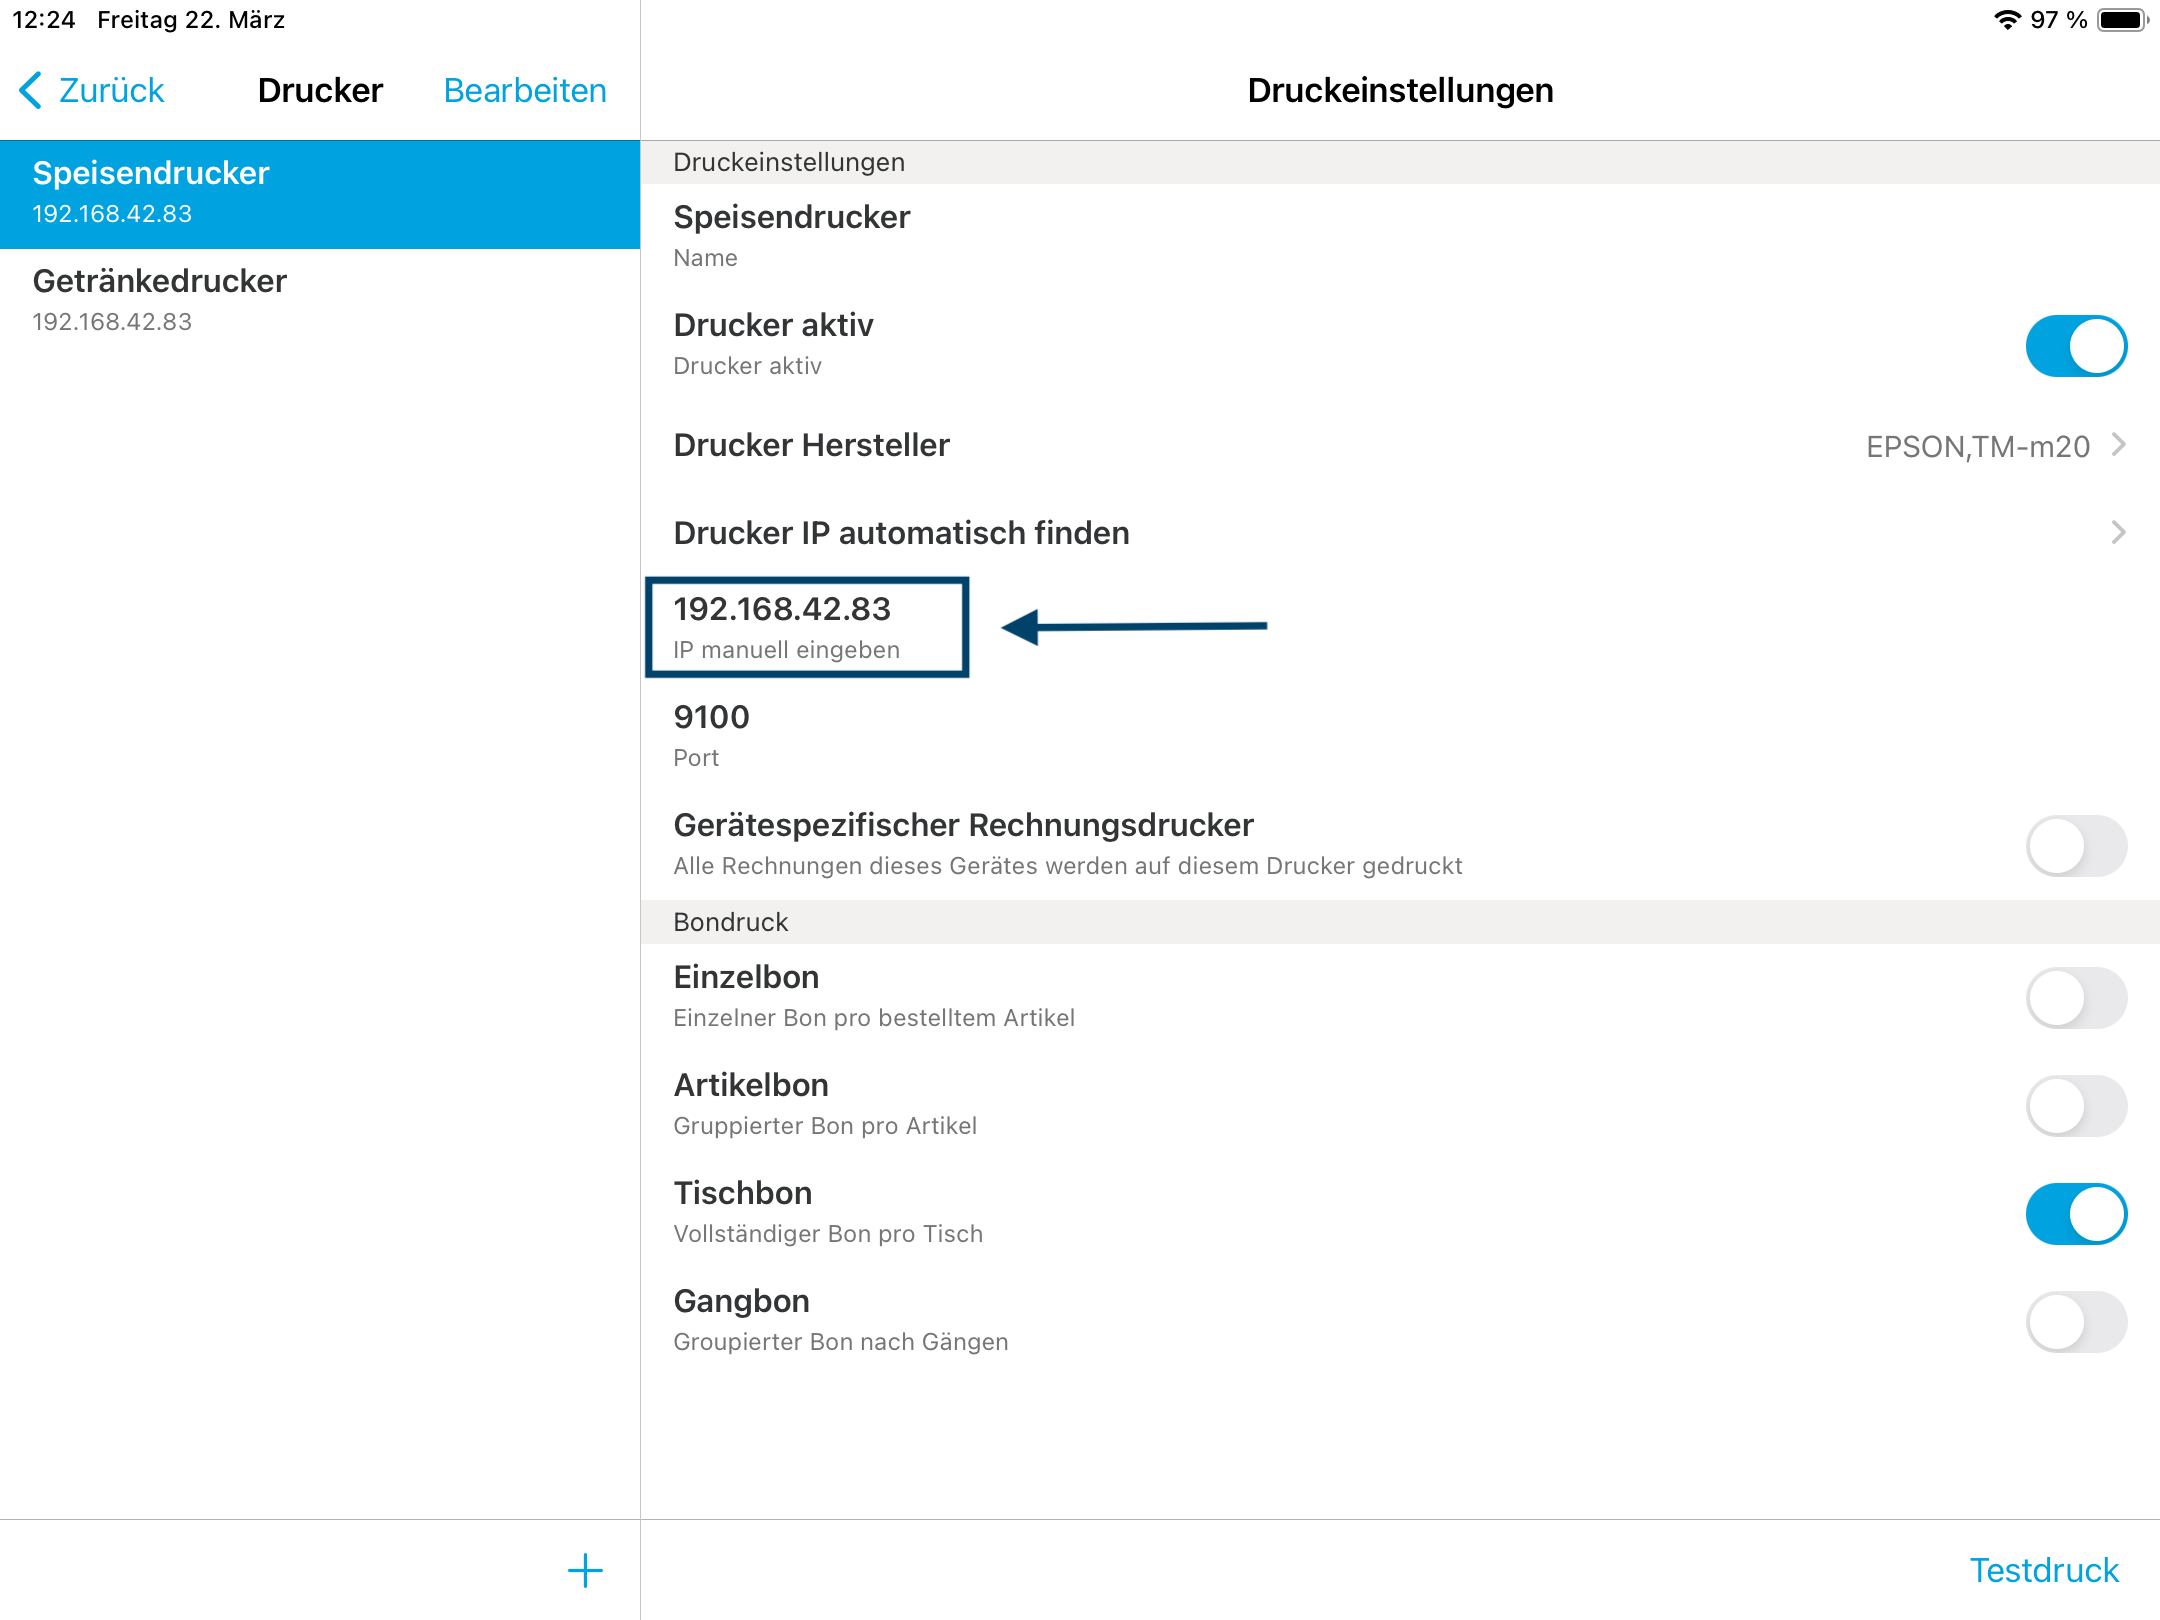
  2. Select the printer that should print the order receipts from your QR Code Ordering System. Write down the IP address of this printer.
  3. Open the Bestellmanagement App and tap on "Einstellungen".
  4. Enter the IP address of the printer in the “Essensdrucker” (food printer) section:
    1. Tap "orderbird Drucker".
    2. Enter the IP address you noted from orderbird PRO.
    3. Tap "OK".
    4. The orderbird Printer should now be displayed with its IP address.
  5. Repeat for the “Getränkedrucker” (drink printer):
    1. Tap "orderbird Drucker".
    2. Enter the IP address of the drink printer from orderbird PRO.
    3. Tap "OK".
    4. The IP address should now be displayed.
  6. Tap "Drucker Test".

If the test print still doesn't work after following these steps, please contact our support team at: help@orderbird.com.

Trouble With Test Printing?

If you're experiencing issues with test printing, please try the following steps (available in German only):

Der Drucker wird über die Bestellmanagement App nicht gefunden

Falls die Anbindung Deines Bondruckers an Dein QR-Code Bestellsystem nicht klappt und der Testdruck fehlschlägt, probiere Folgendes:

Wird Dein Druckermodell unterstützt?

  1. Prüfe, ob Dein Druckermodell kompatibel zum QR-Code Bestellsystem ist. Aktuell unterstützen wir nur die Modelle Epson TM30 uneingeschränkt, und neuere Modelle (nach 2016) des Epson TM-88VI und Epson TM- 20 III.
  2. Falls Du einen anderen Drucker als die hier aufgeführten Modelle nutzt, kontaktiere gerne unseren Support für eine Beratung.

Aktiviere ePOS-Print für Deinen Drucker

  1. Füge die IP-Adresse Deines Druckers in die Adresszeile eines Browsers (z.B. Safari, Google Chrome, ...) im Format 123.456.789.111 ein.
    Optional: Wenn Du nach Login-Daten gefragt wirst, gebe als Nutzernamen "epson" und als Passwort "epson" oder die "Serial No." Deines Druckers ein.
  2. Klicke im Menü auf der linken Seite auf „EpsonNet Config für TM-i“
  3.  Klicke im neuen Menü auf der linken Seite auf “ ePOS Print“.
  4. Im Menü wählst Du jetzt „Enable“.
  5. Klicke auf „Apply & Restart“, um die Einstellung zu speichern.
  6. Gebe anschließend wieder Deine IP-Adresse ein und folge den Schritten wie oben beschrieben.

Falls es nach diesen Schritten immer noch nicht mit dem Testdruck klappt, melde Dich bitte bei uns im Support: hilfe@orderbird.com.


<< Back to Step 8
Step 9/11
Next Step >>
order management link printers

Was this article helpful?

Yes
No
Give feedback about this article

Related Articles

  • 10. Placing QR Codes on the Tables
030 208 983 098

About orderbird

With over 17,000 customers — restaurants, cafés, bars, clubs, and beer gardens — orderbird is one of the leading Point of Sales systems for the hospitality industry in Europe. With the mobile POS system orderbird MINI, orderbird also offers a smart cash register solution for service providers, retailers, mobile hospitality, and the crafts.

orderbird was founded in 2011 and today employs more than 120 people.

Address

orderbird GmbH
Ritterstraße 12
D-10969 Berlin
Phone: 030 208 983 098

Opening hours

Monday: 09:00 - 18:00
Tuesday: 09:00 - 18:00
Wednesday: 09:00 - 18:00
Thursday: 09:00 - 18:00
Friday: 09:00 - 18:00
Saturday: Closed (except emergency support)
Sunday: Closed (except for emergency support)


© 2026 orderbird GmbH
  • Imprint
  • Privacy Policy
  • Legal Notice
Expand